

Raising the Rafters
It's time, the walls are up, the rafters are all notched and ready for assembly and they've been hauled to the second story floor. Time to raise the rafters!!!
First, a disclaimer, all the pictures of the first rafter going up were taken by seven-year-old JW1. Where was I, you may ask, on this momentous occasion? I was in town dealing with a child having an allergic reaction to a bee sting. The yellowjackets have been absolutely horrible this year! The barn building has been frought with multiple bee stings!
I was hoping the guys would not attempt the first rafter (the most difficult and dangerous) by themselves until I was back, or the next day, when we would have extra help. So, thankfully, JW1 was able to take the pictures while his oldest brother did the milking chores for me, and the second oldest watched the baby and did the dishes in the house. And I must say, JW1 did a right good job of capturing the first rafter going up!

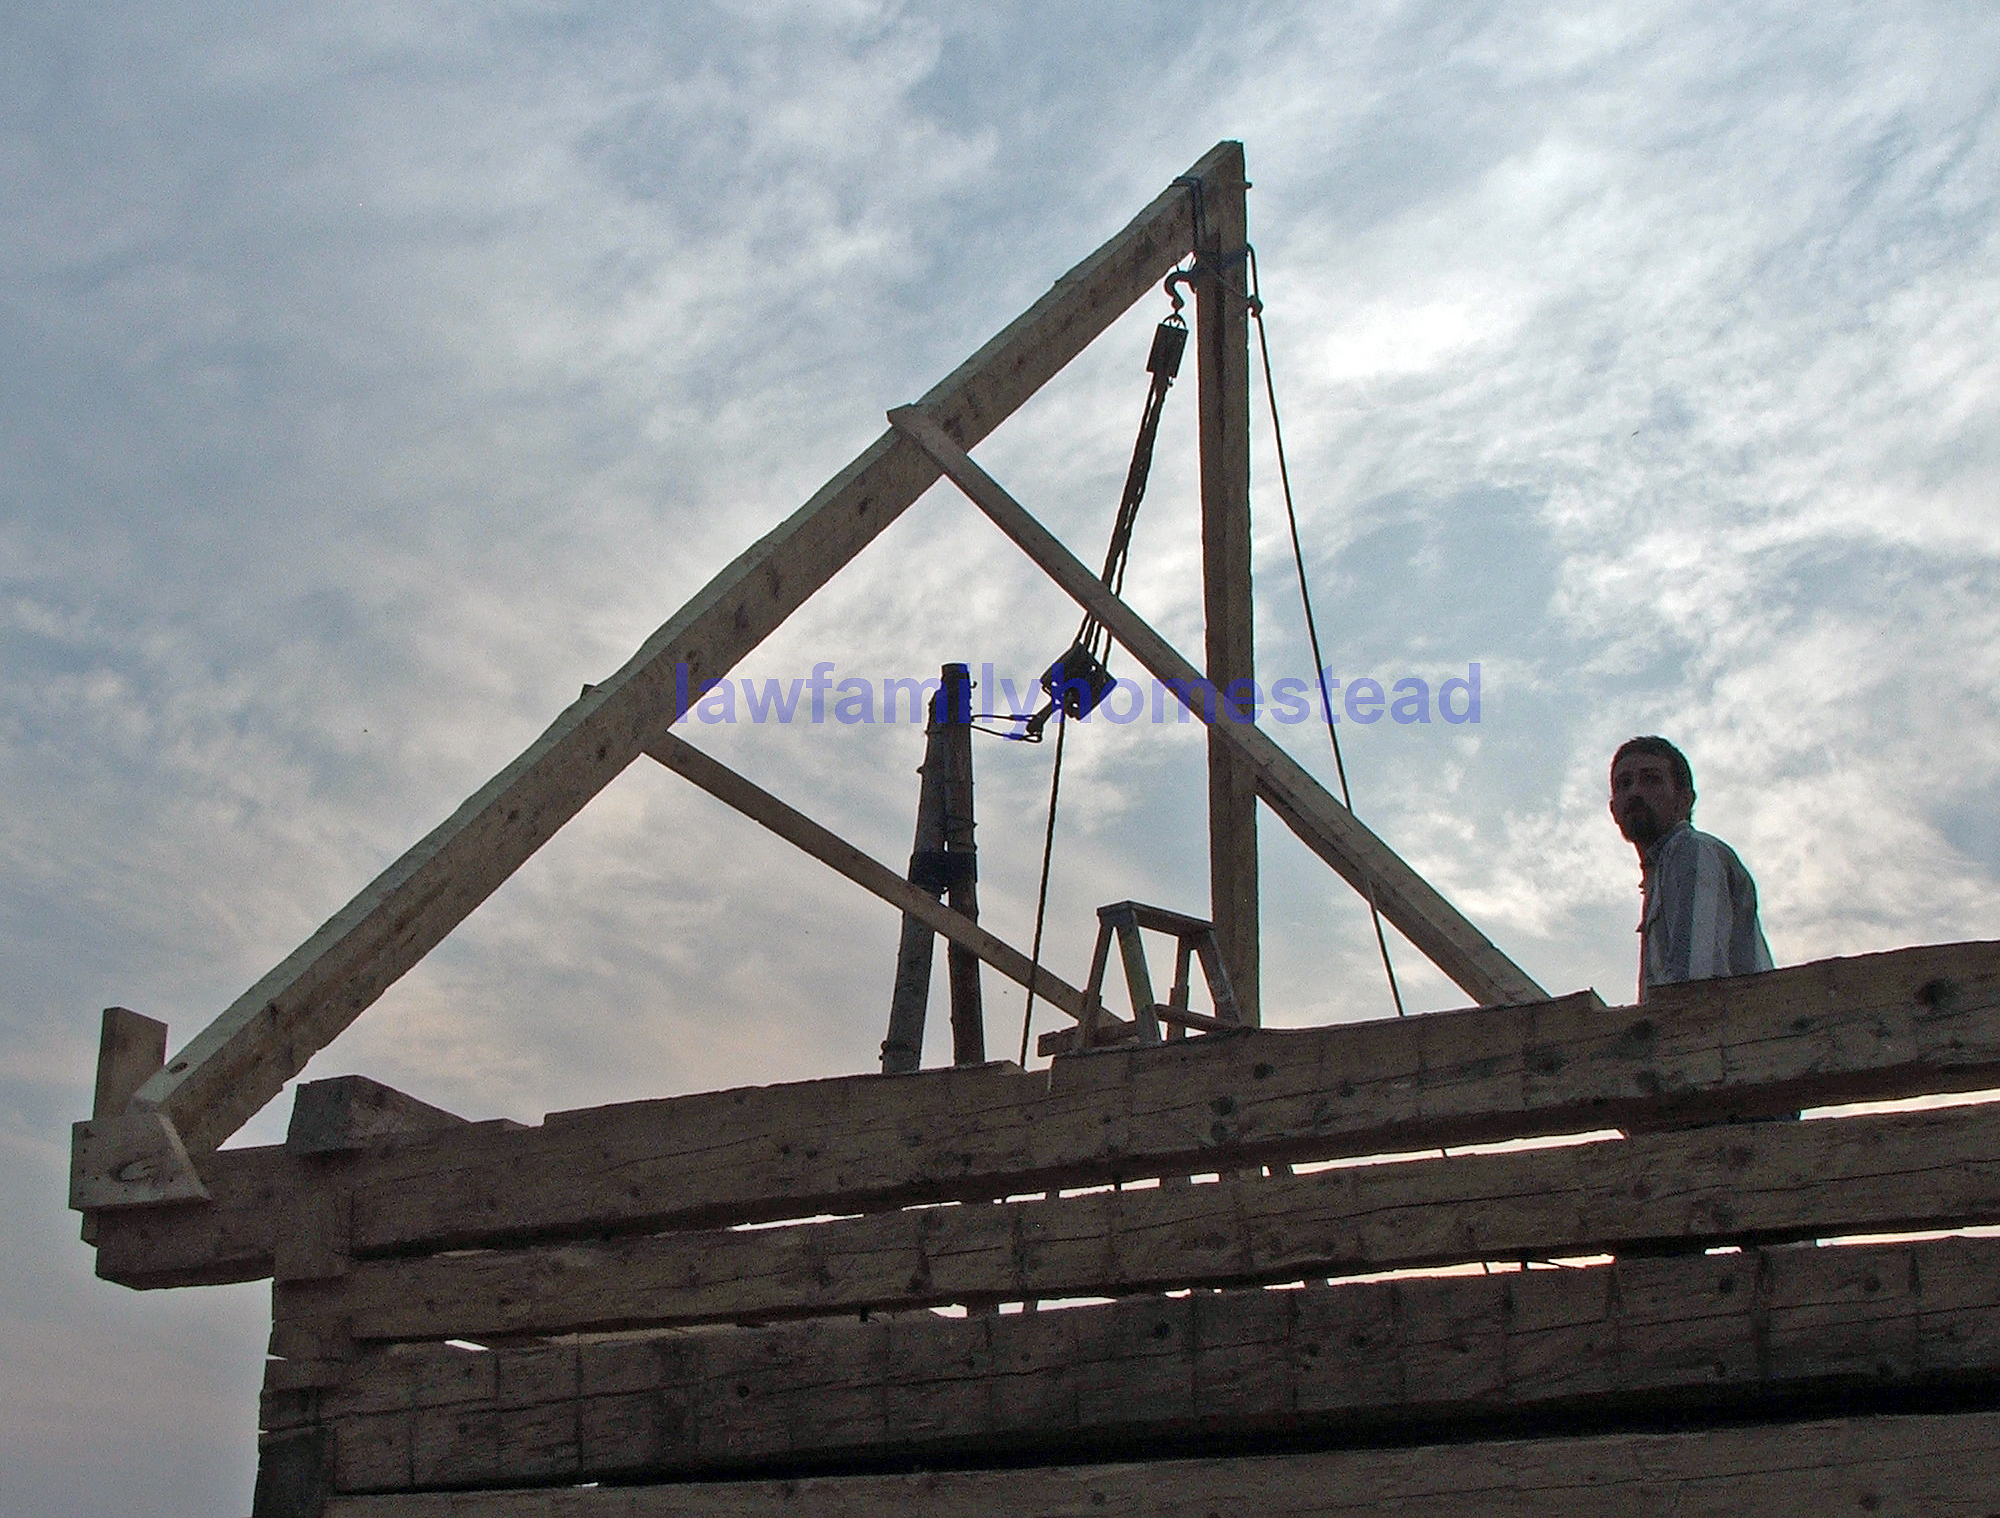
First, Uncle Peter made these awesome little cage things for the rafter legs to drop into, so they didn't accidentally miss their notch and dropped off the top of the barn. We only made eight pairs of rafters, there were no extras, which added another elment of stress to a already very stressful situation.

Next, the rafters were assembled. This was accomplished, for the first several, by laying the legs on the wall with the peak laid on a sawhorse to fit the mortise and tenon joint.

Here, Kit gets ready to drive the handmade pegs into the mortise and tenon joint to hold it together.

Uncle Peter inspects the joint making sure everything is good to go before they started lifting this rafter up.
Going up!
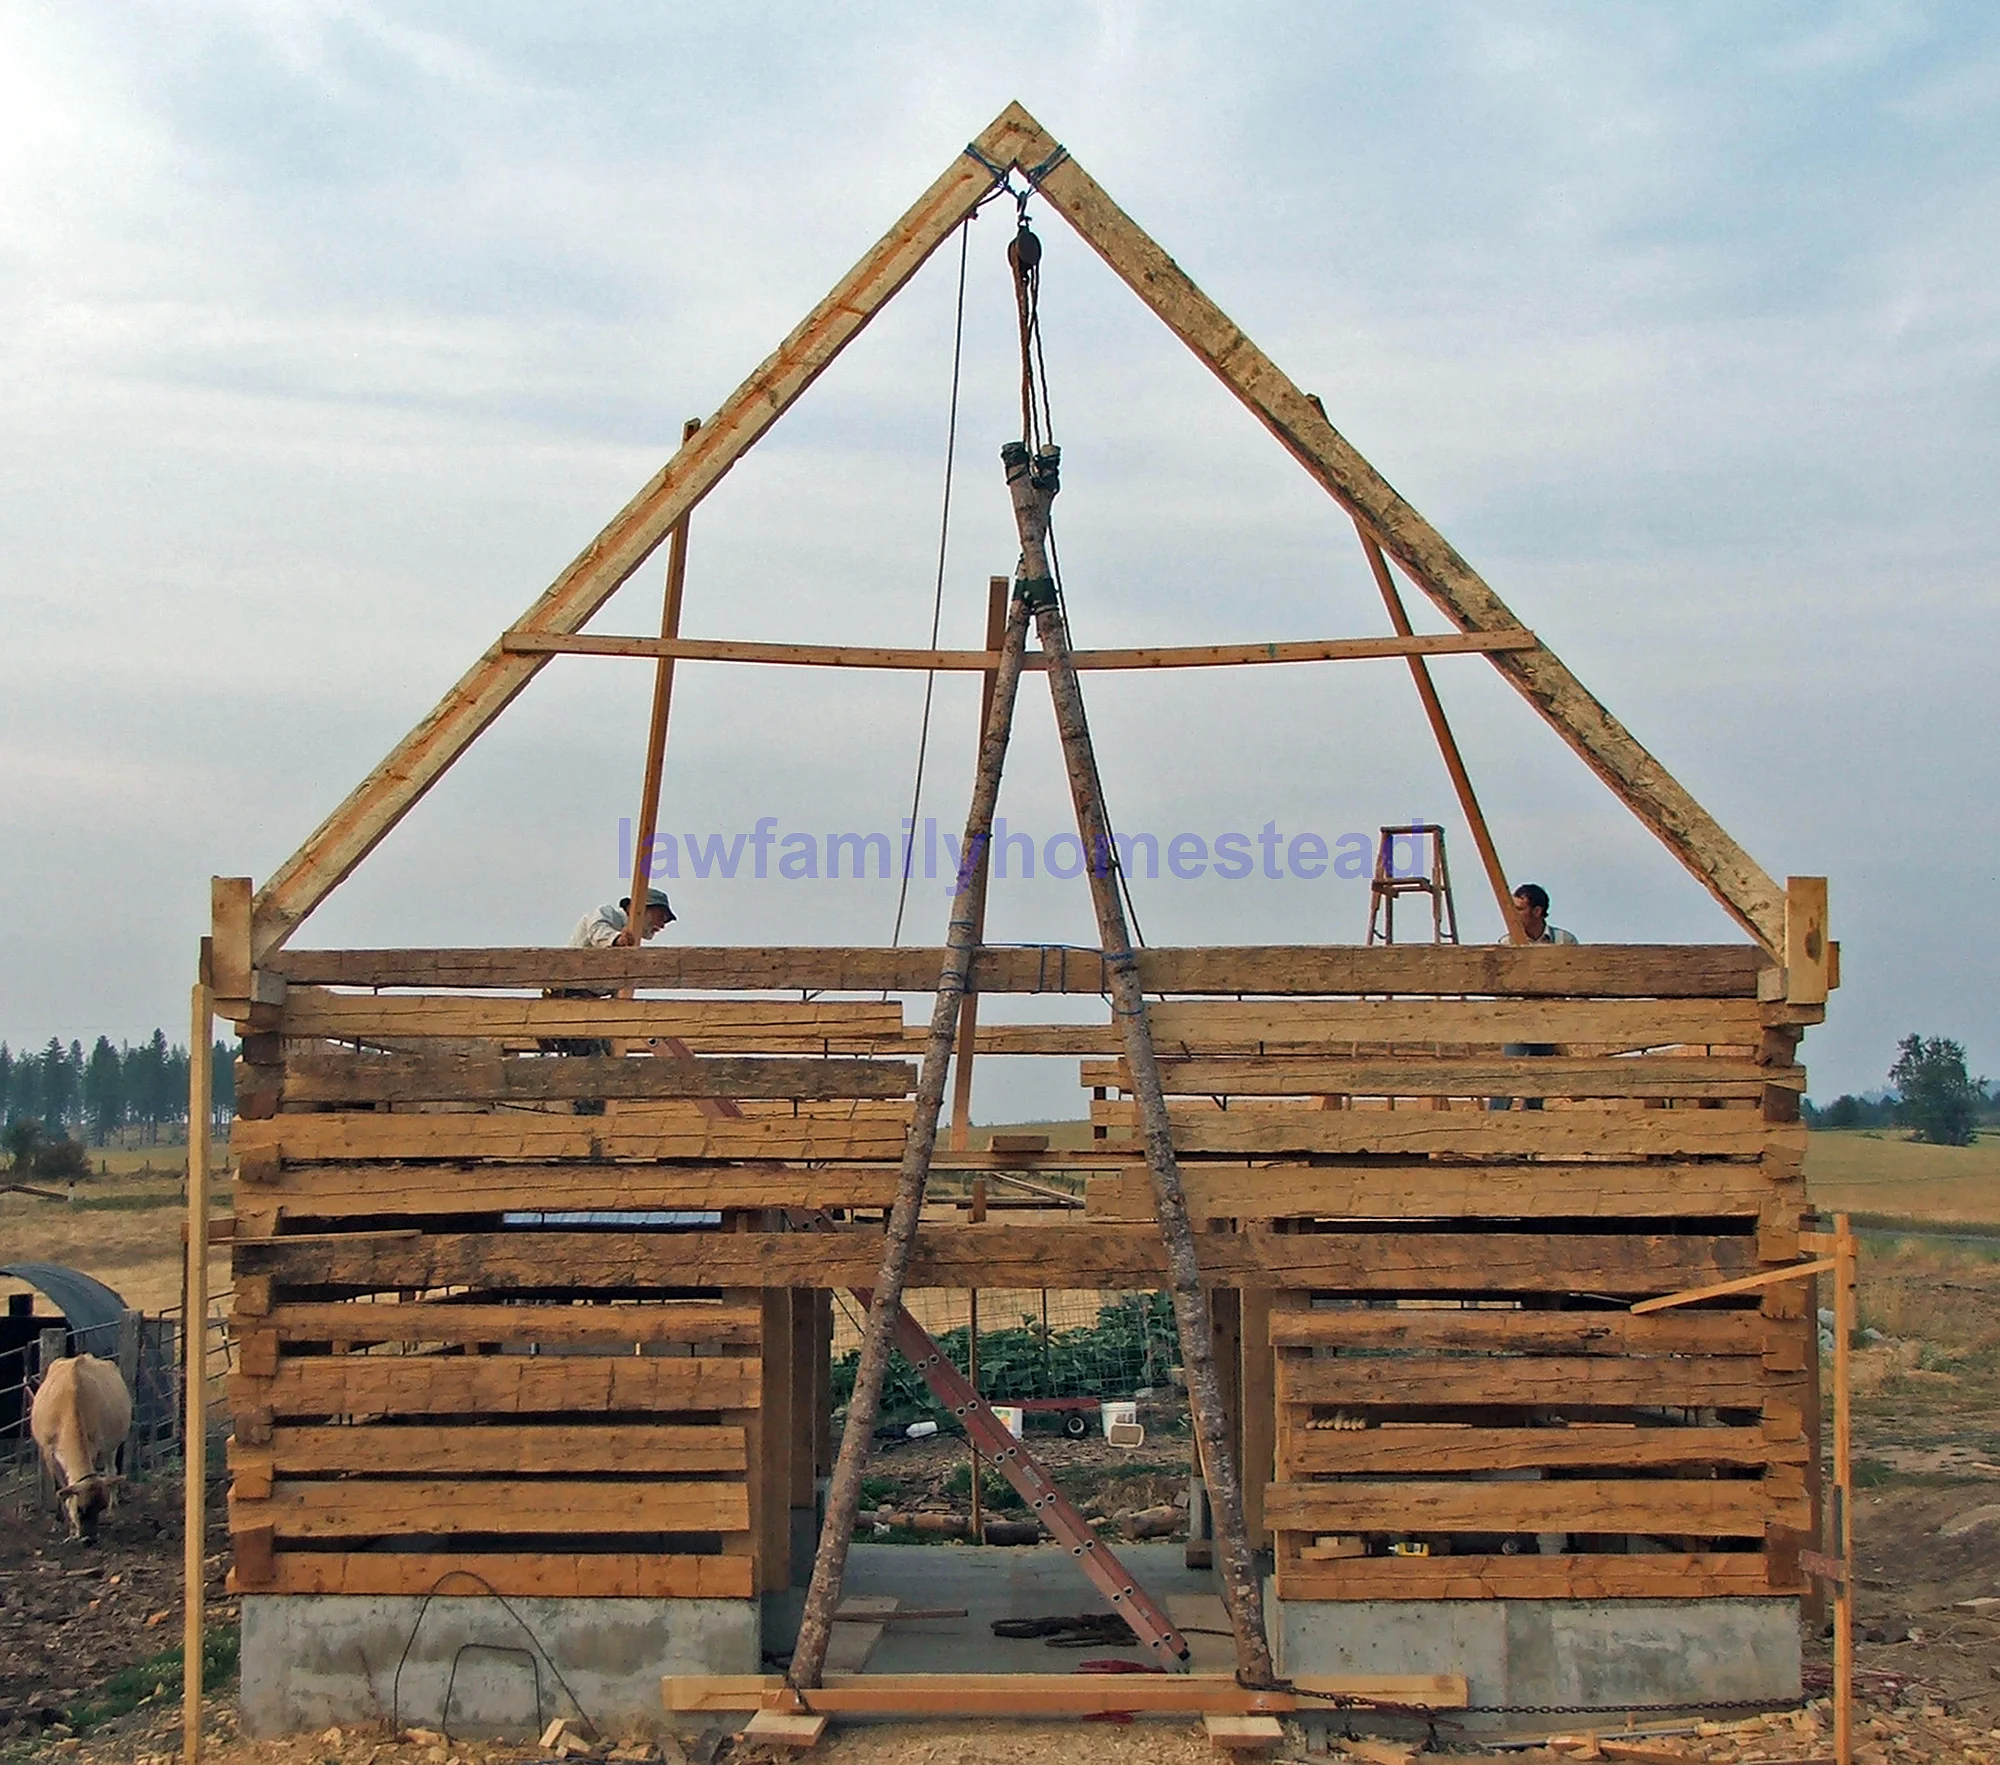
The original idea was to pull the rafters up with the shear legs. They tried, but it didn't work the way it needed to. So, in the middle of lifting the first rafter, they had to quickly switch to using 2x4s to push it up and into place. And these aren't light!

As soon as it was up they quickly put bracing in place to hold it overnight and until the next ones could be put up.

Uncle Peter appears to be thinking, “I sure hope it stays”!!!
So this is what I saw when I got home from town. Looks awesome! But gave me a sick feeling in the pit of my stomach to think that two guys put it up by themselves.

Uncle Peter and Mark lay the second rafter out.

Two rafters up, and braced.

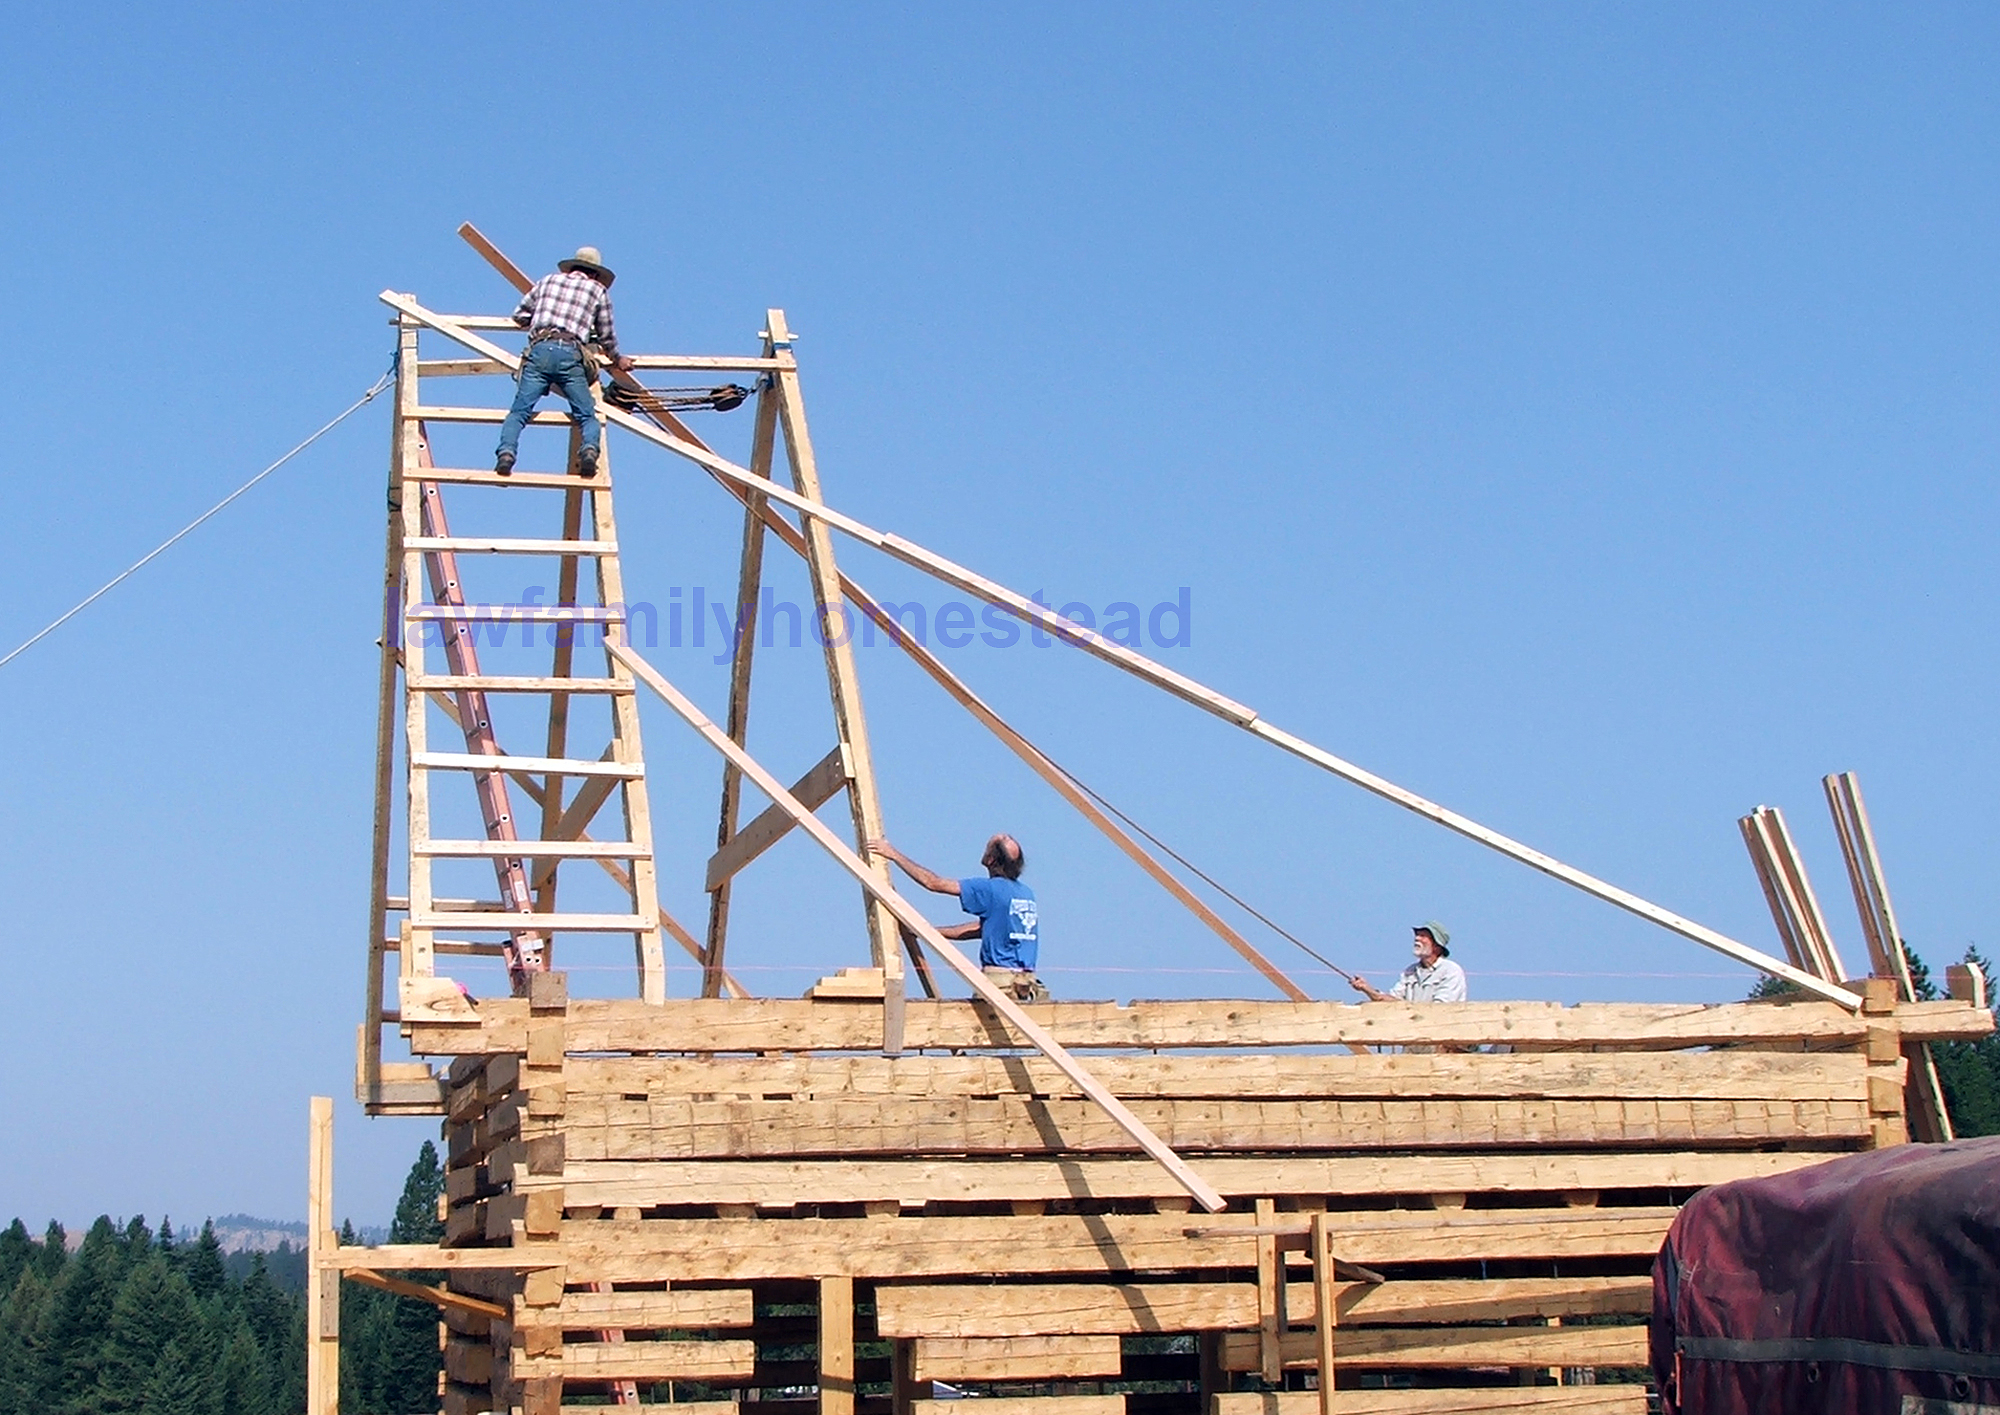
Number three going up. Much easier with three guys instead of just two. They hooked up a block and tackle to the first two rafters and used it, along with the 2x4s, to push and pull the next rafters into position.

You can see the block and tackle better in this photo.
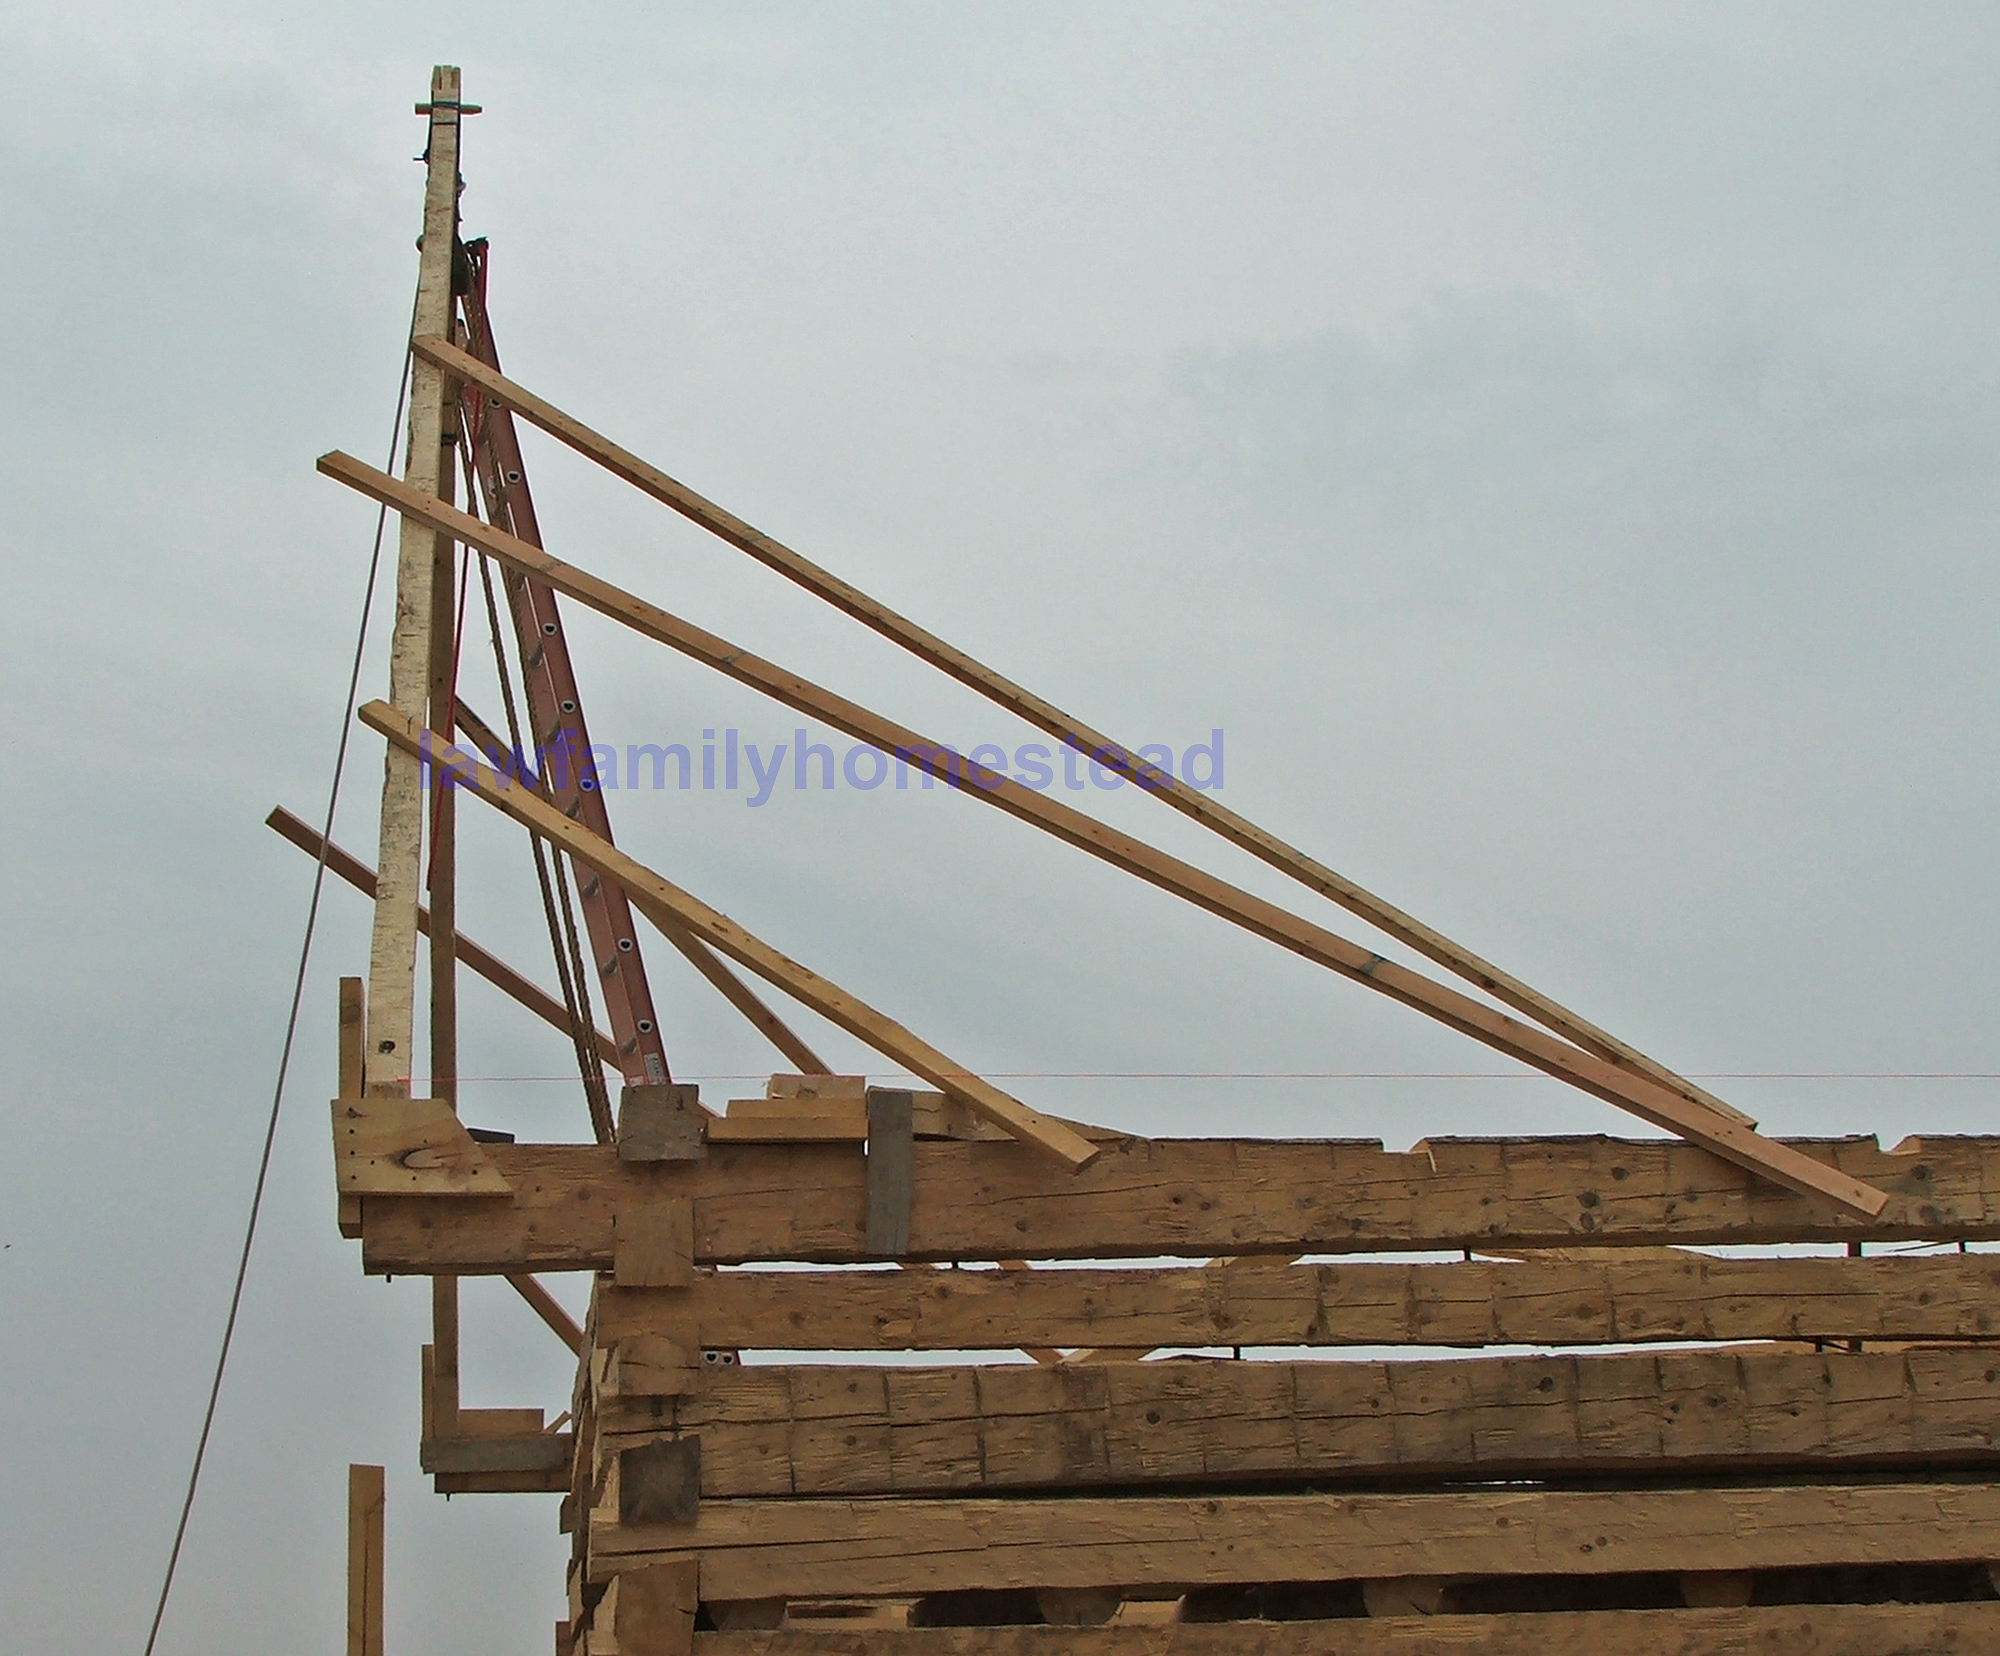
They nailed a "ladder" clear to the top of rafters one and two and used it to fasten the following rafters, bracing them to each other as well as to the wall.

REACH! There is still has a bit of heart stopping work to do once you make it up the ladder! Here Kit nails the next braces in place.

Kit and Mark put the braces on the fourth rafter.

At this point it the guys decided to take a break in putting up rafters because the small fray we had noted earlier (seen on the left-hand strand here) in our 30-year-old block and tackle rope was becoming a little more pronounced. They figured it best to try and find some new rope. So Mark was dispatched to Lewiston to pick up the last roll of manila/hemp rope Home Depot had in stock. Uncle Peter and Kit decided to finish laying the floor on the second story, so it was completely solid instead of just two strips down the sides with the middle open.
So next, we will finish putting the floor in.