
At last we have another post on the progress we've made on our Hand-Hewn Log Dairy Barn. We were busy working on it through the fall and winter of last year, and spring of this year. This past winter we thoroughly enjoyed having a fine set of huge double doors on the north side of the barn! It is very rewarding working in an enclosed environment, and I can't wait to get the rest of the doors on now!

Last fall we had Granddaddy tongue and groove the boards we were going to use for the doors. These boards were milled from a Douglas fir on our property. We chose to pattern the door after a late 18th Century Early American door pictured in a book by McRaven. After the tongue and groove was complete Kit hand-planed the boards with planes given him by Great Uncle Tommy and Great Uncle Peter. The hand planes smoothed the rough-sawn 2-inch board surface while leaving tool marks behind that still give it a rustic look.
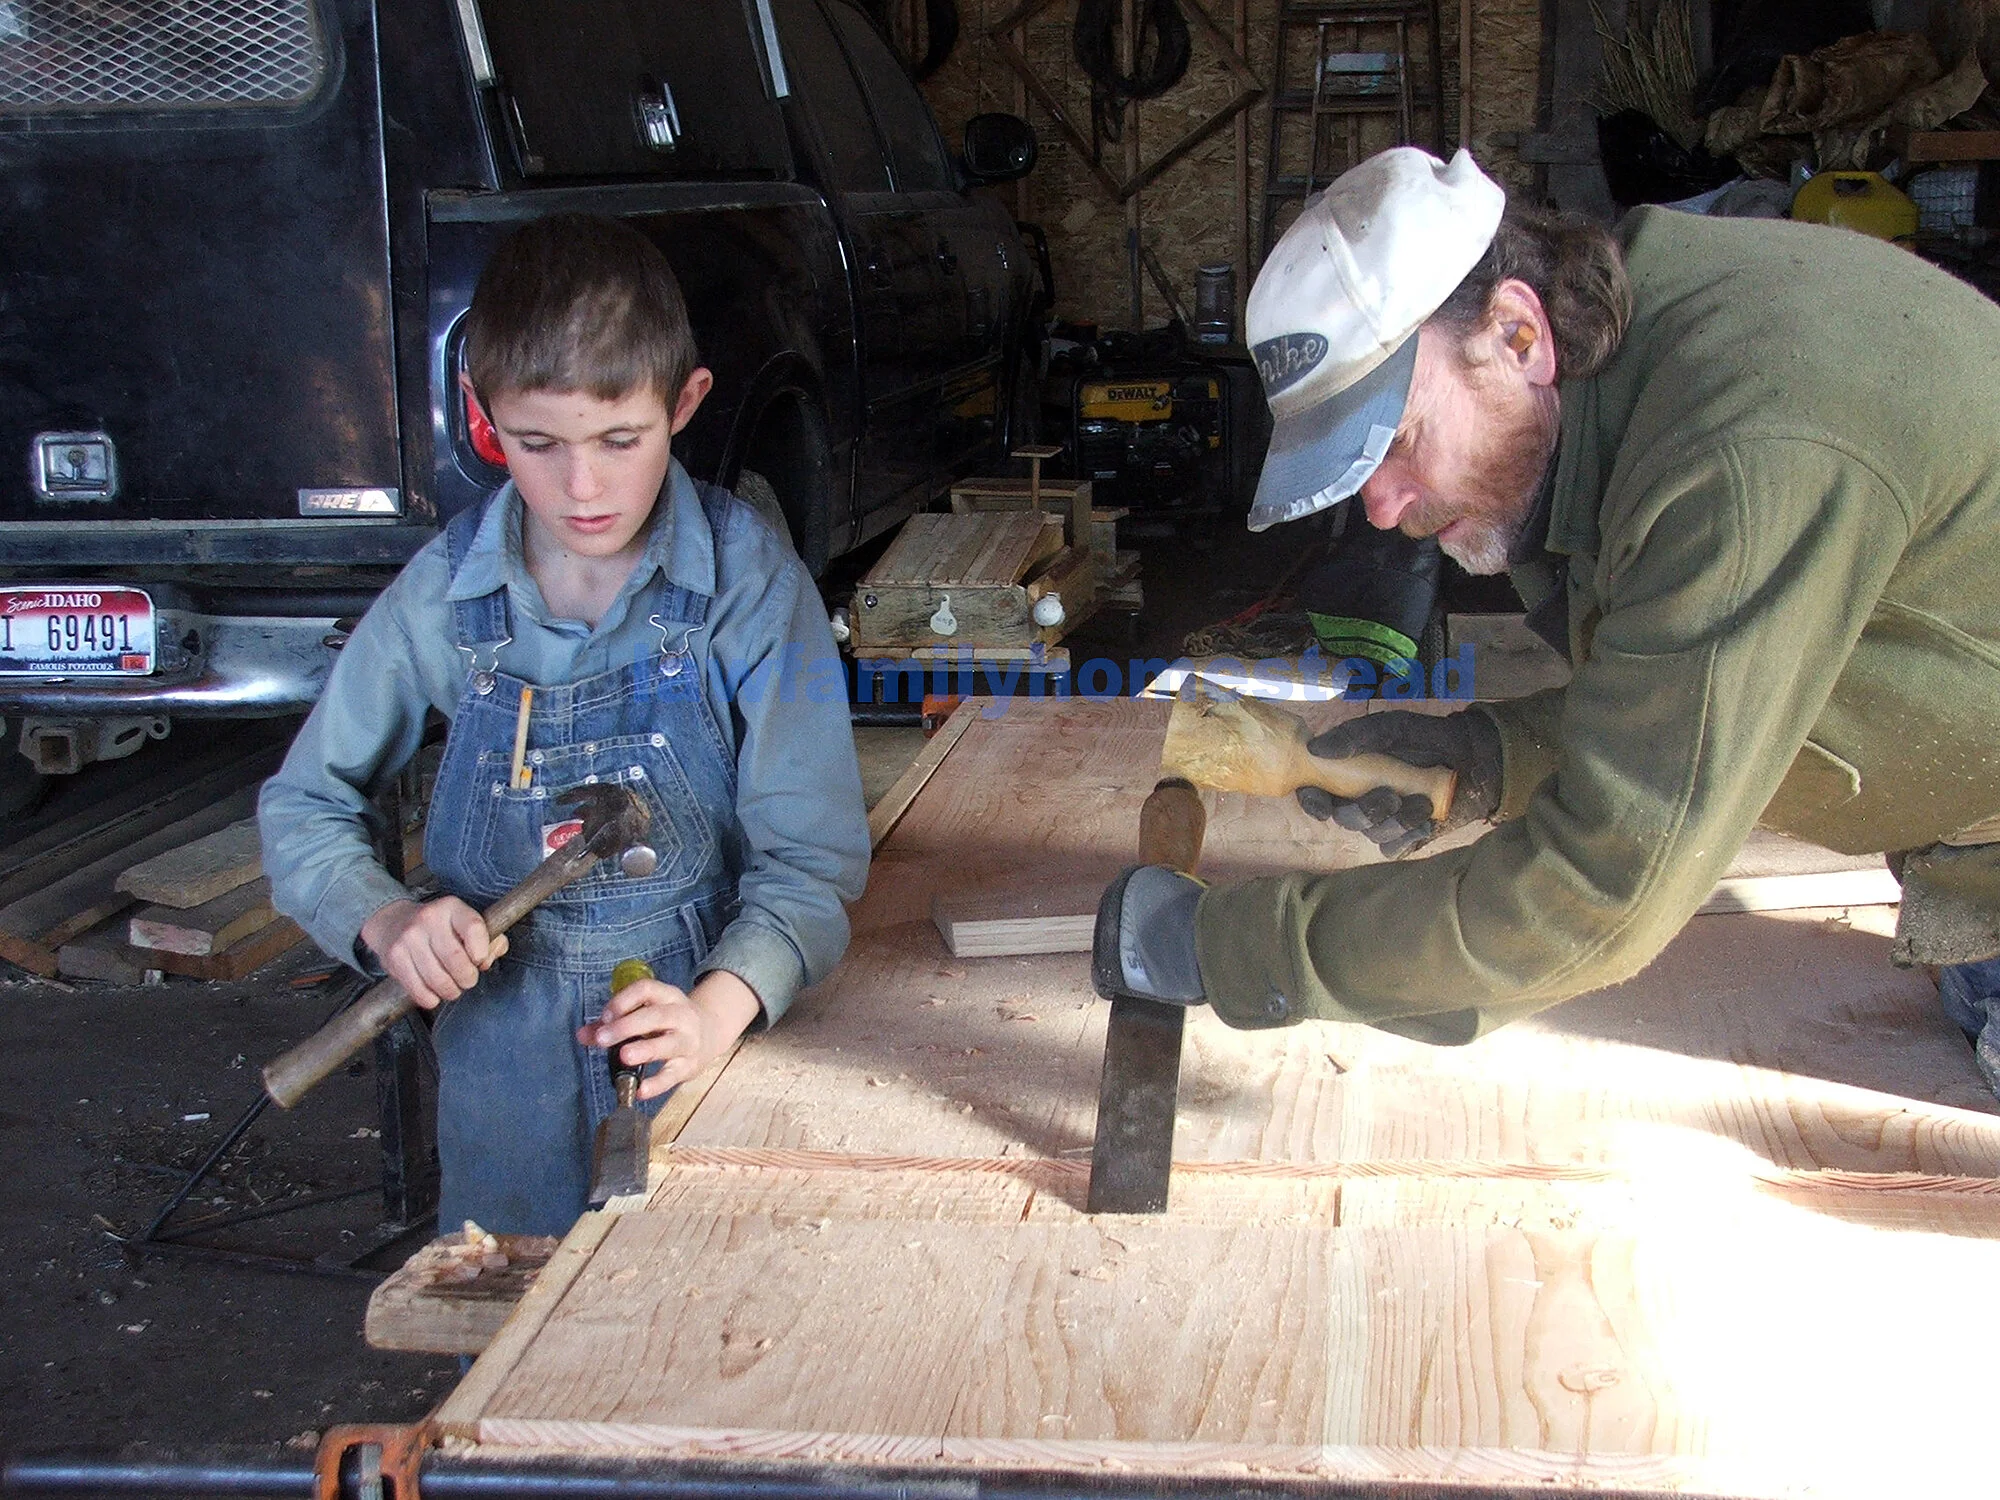
The guys then cut dovetail slots for the cross batten's with a skilsaw, then chiseled them out with Uncle Peter’s slick and smaller Stanley chisels. They drove the cross battens carefully into the slots and nailed them in place with 30 small, hand-made, square-shanked nails per batten.
We then painted the doors with several coats of the same log finish we used on the barn logs and allowed it dry.
While the finish was drying on the doors, Kit started working on twisted interior door handles and pintle hinges.

The hinges were a major undertaking. Kit forged them out of ¼ x 3-inch wide flat steel.

Each hinge, (they are 4-foot hinges) and pintle hinge plate took roughly a full day to build.

Kit secured the hinges to the door with large, hand-forged spikes. He clinched the ends of the spikes over on the inside of the door.

Before Kit could forge the spikes and smaller nails he had to forge the tools to do so, namely, two sets of fire tongs forged from one foot pieces of 5/16 x 3/4 inch barstock to grip the 3/8" and 1/2" round rod for the nail making process. He also cut a piece of spring steel to make a heading plate for forging heads on nails. It was annealed, forged, drilled to accommodate several rod diameters, and finally hardened.

The hinges look totally awesome!

We put three hinges on each door. These 2-inch doors are HEAVY! Kit wanted to make sure they wouldn’t tear away from the barn wall.

We fit the 3 x 6 inch door jam to the hinges in the shop making sure the pins in the hinge would line up and move. Getting two to line up was tricky! Getting all three to line up and bear weight equally took some careful measuring and precise fitting. The pintle plates have six, 3-inch machine screws run completely through the jam into a threaded 1/4" steel plate inlet into the backside of the jam for further re-enforcement to keep the heavy doors from pulling away from the jam.

Kit makes a last inspection before undertaking the job of hanging the 160-plus pound doors.

The door jam’s thickness was taper ripped from one end to fit the door opening so they would be perfectly square and plumb. After the initial test fit, 12-inch lag screws were used along with an anchor bolt into the concrete to secure the door jam though the rough opening and into the logs.

I had lined up a couple teenage boys to come help hang these doors. Kit had asked his dad to come help hang the doors also. Hmmm - He was finished a day earlier than he planned on, and couldn't wait until help arrived the very next day to hang them! Sooo - the two of us hung the north barn doors by ourselves! I'm pretty sure if you can hang huge barn doors together without a serious mishap, you can hang wallpaper together!

Door one temporarily tacked into place to check the fit.

Two doors temporarily tacked into place. (This is a later picture after the interior walls were framed in.)
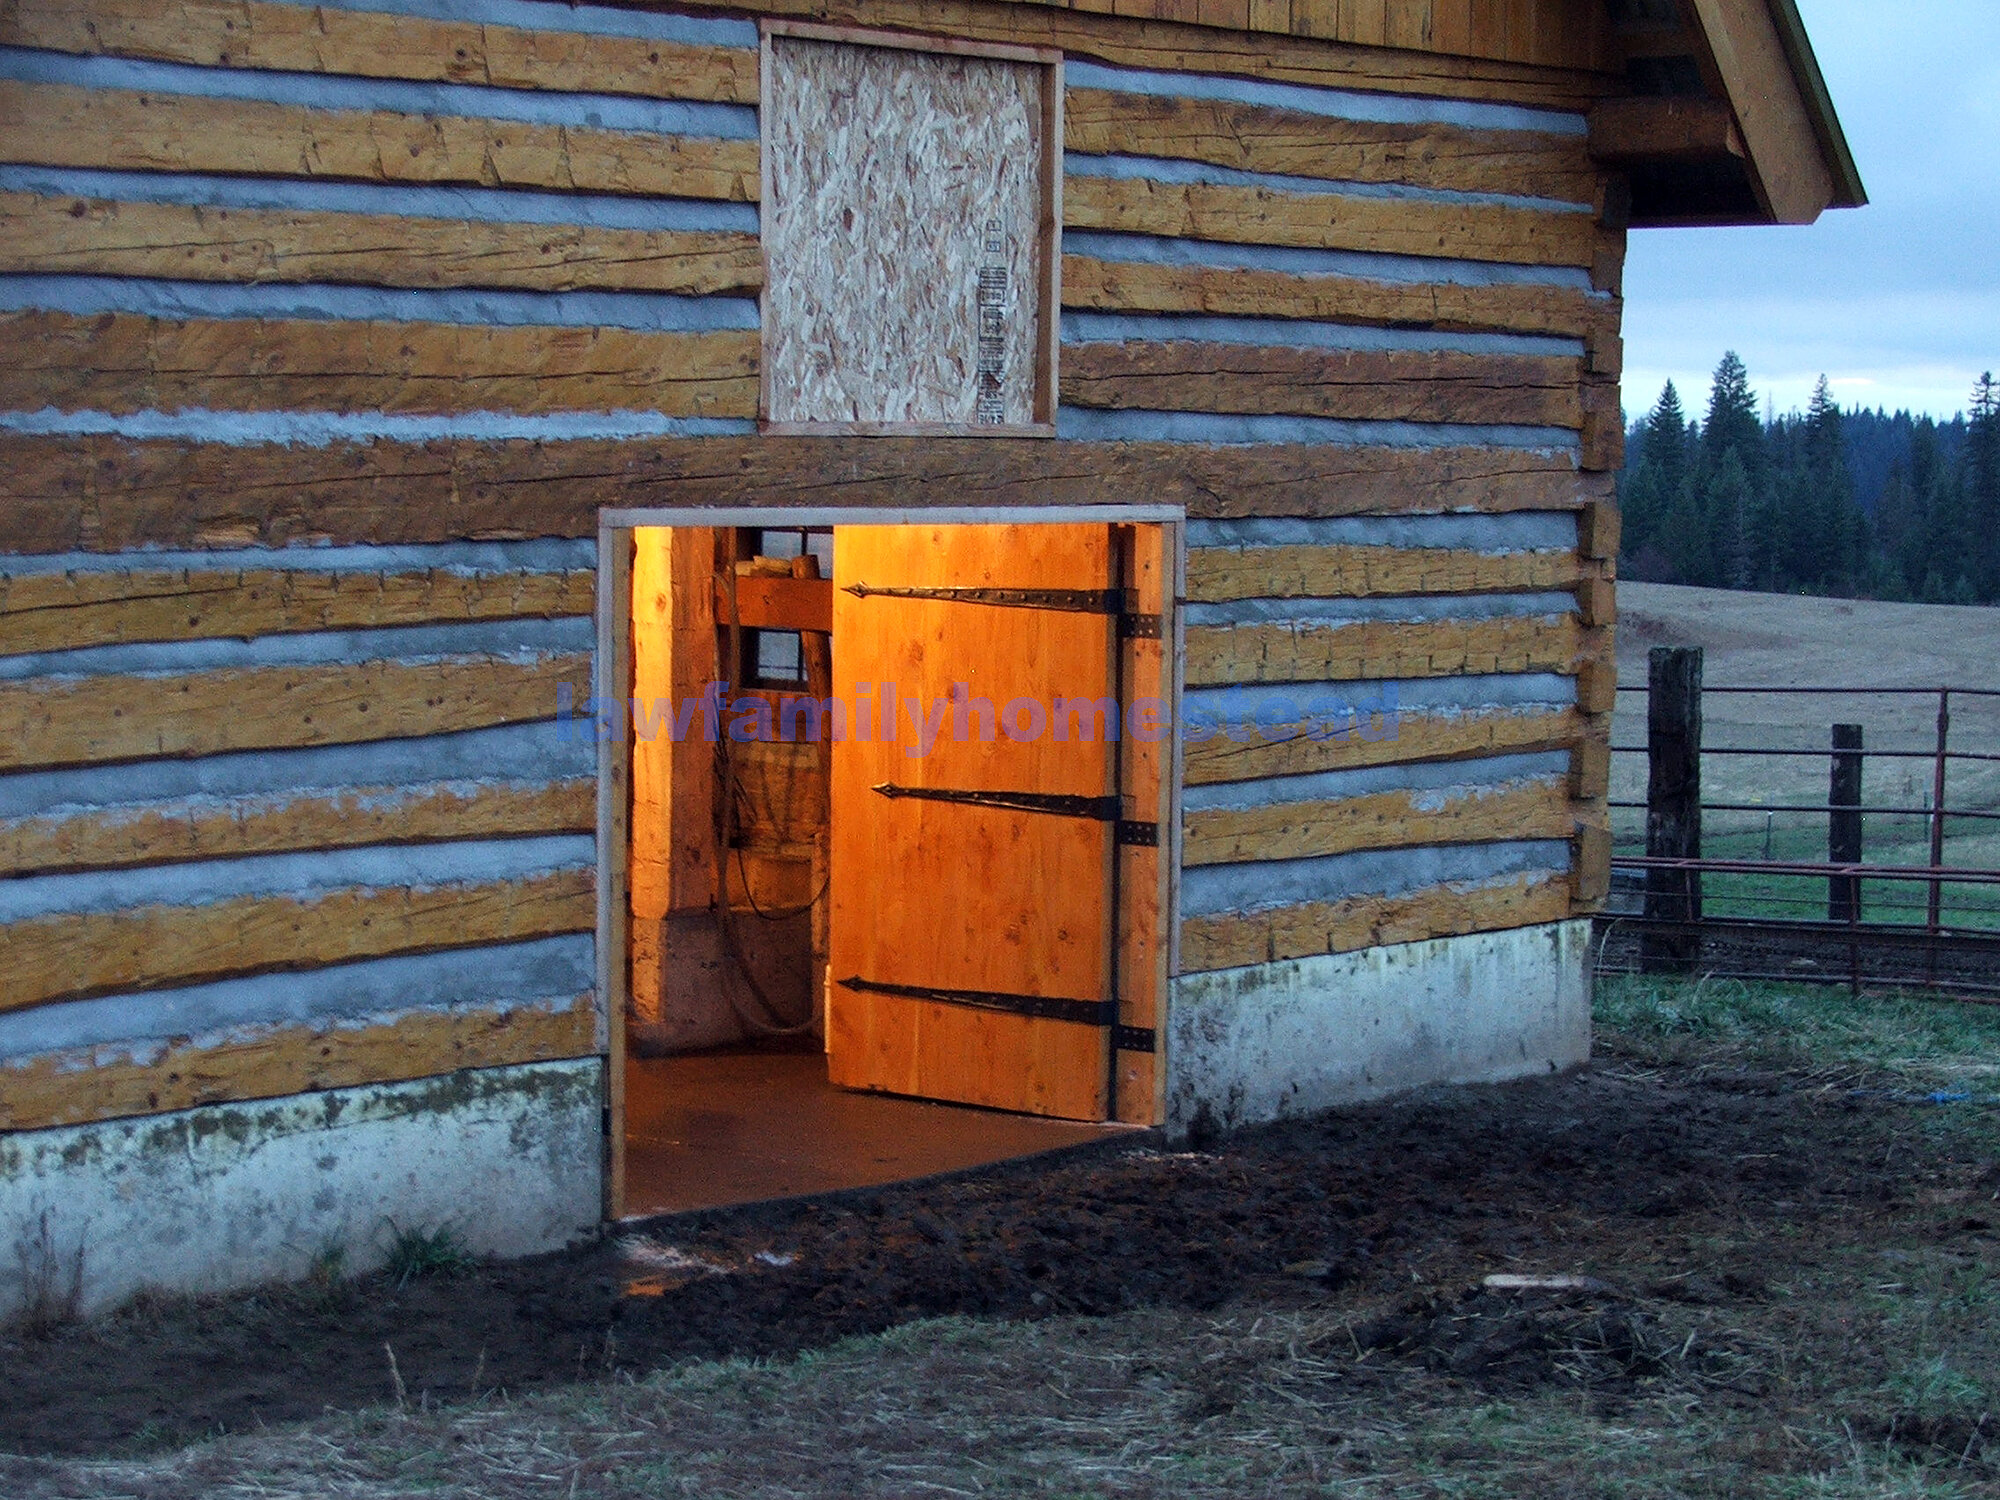
It looks awesome in the twilight, with the interior lights reflecting on the door!

An inspection from outside by the Law men. They all agreed it was the crowning accomplishment thus far on the barn project.

Over the next several days, the winter winds started blowing from the north and winter, with its snow, arrived - "Just in the Nick of Time."

We made minor adjustments over the next few months, including cutting the trim and installing it on the front door. The term Cow Palace now comes to mind!
You will find these doors for sale (custom made) on our store page!