
Finally this past spring, in between rain and snow storms, we started the chinking process on our barn. If you thought it looked cool before, wait until you see it now! The chinking in the walls gives the barn a whole new look.
We have followed the information detailed in a book written by McRaven who restores and builds hand-hewn, dove-tail notched cabins. He says over the years he has developed a chinking method he now uses on all his cabins. Since we've been following his advice on other aspects of this building project, we figured we might as well stay with the expert’s opinion.

First we purchased a bunch of metal lath similar to what is used in stucco work.
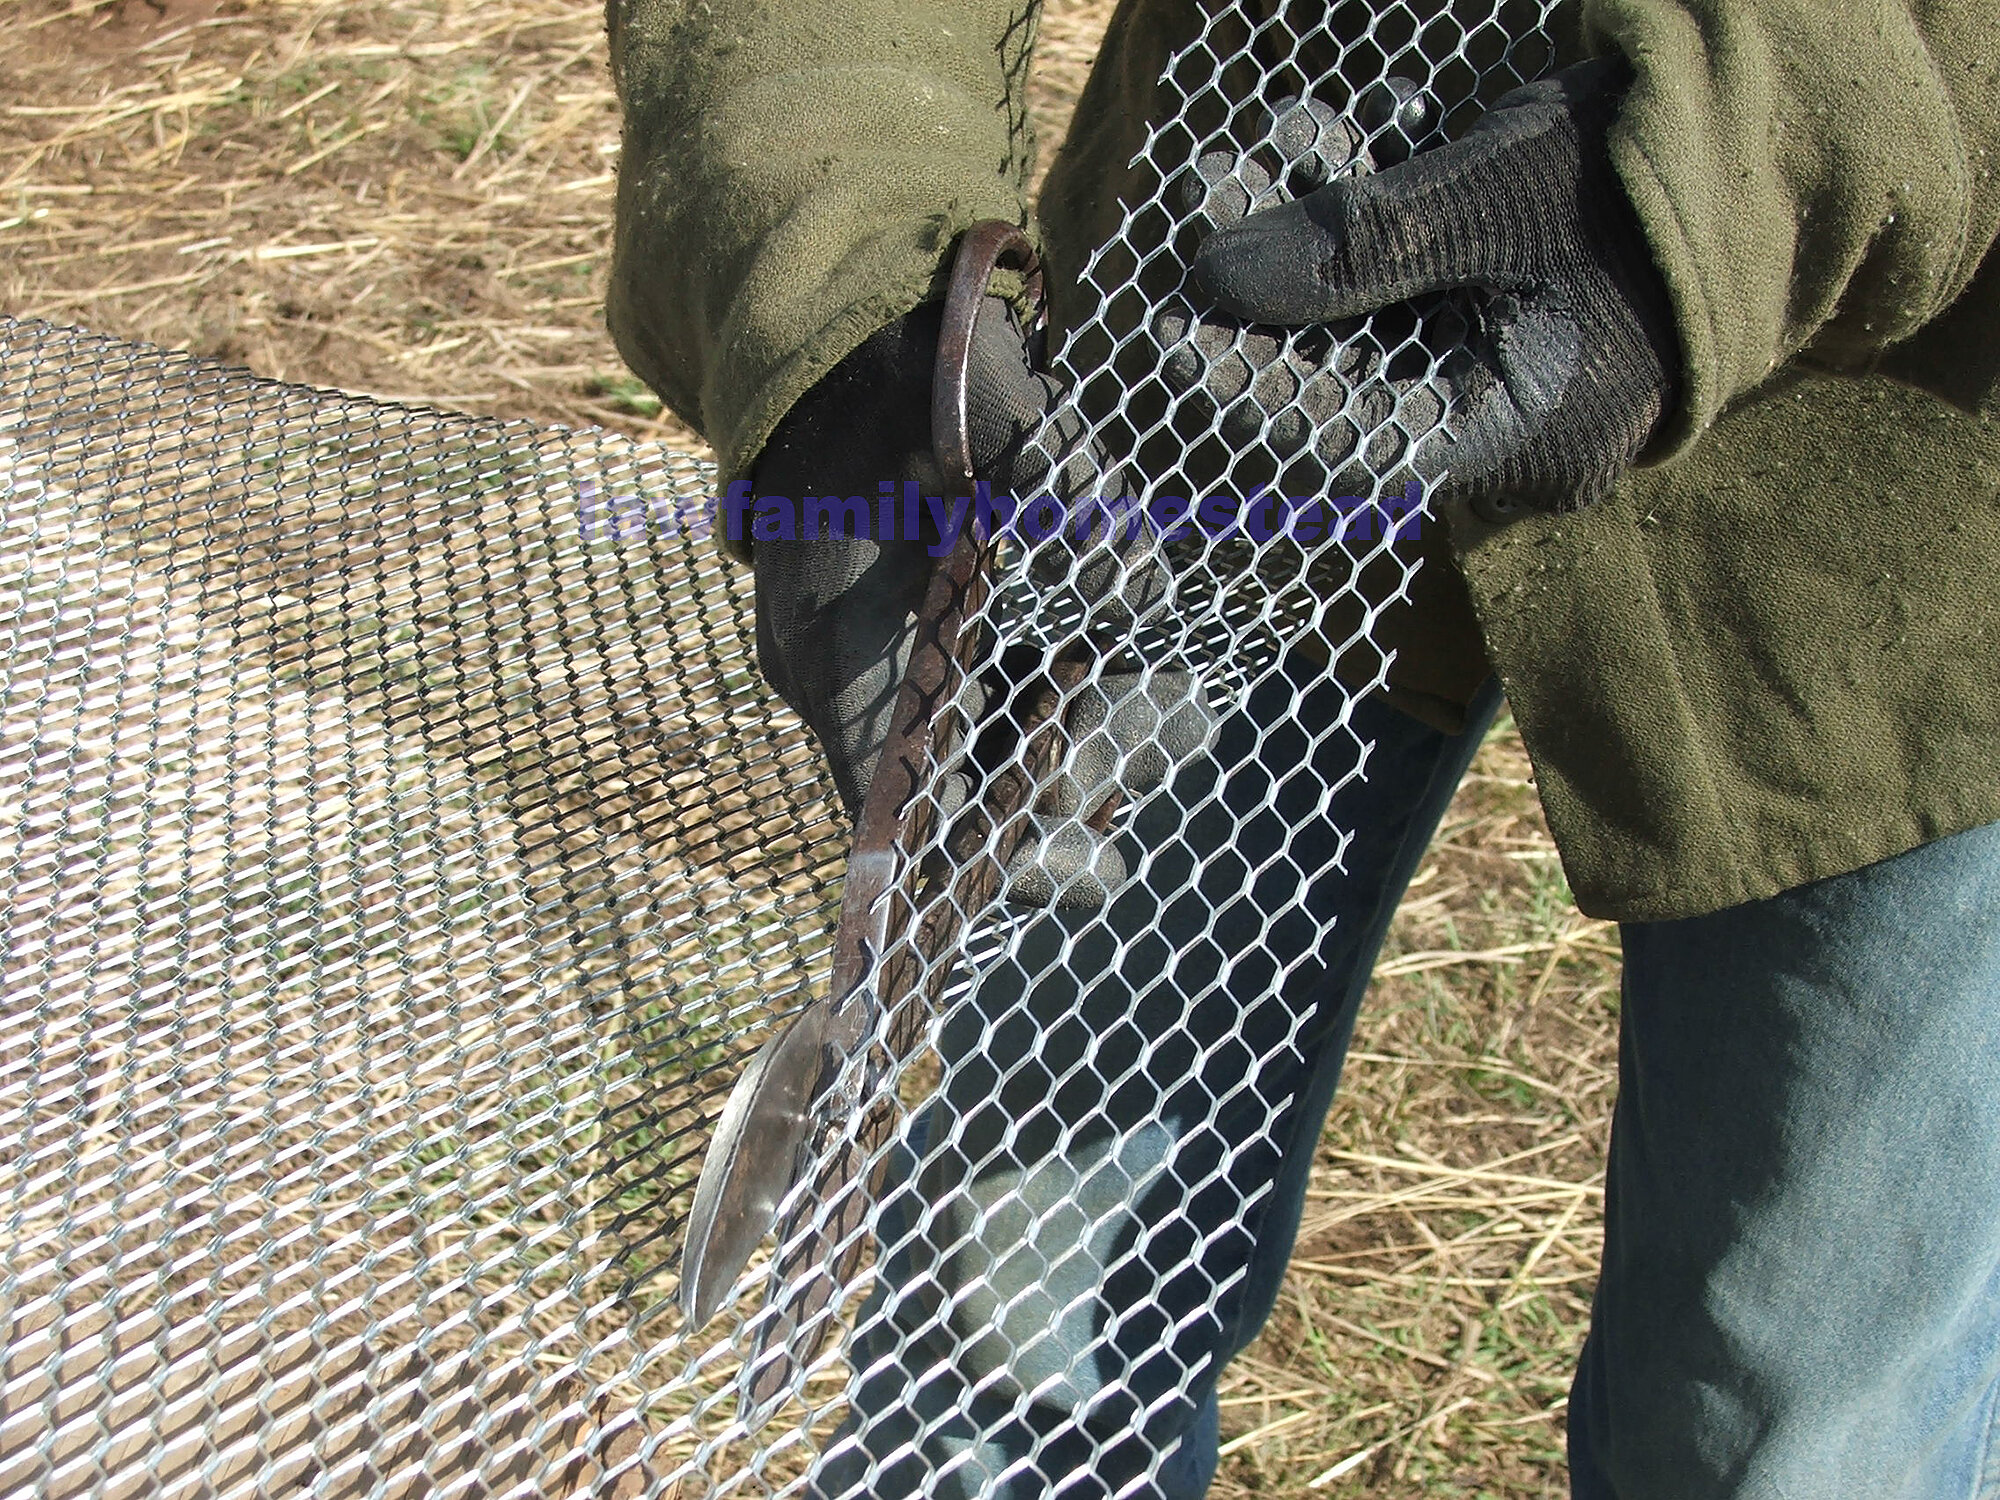
Kit cut this using metal shears. He measured the opening between the logs and added an inch.

We then pushed and poked the measured lath into the groove cut on the underside of the top log before the logs were laid course by course. The bottom of the lath is brought just to the outside edge of the bottom log, sloping outwards. It was secured using small nails.

Then we mixed mortar in a wheelbarrow. We learned over the next several batches to make it drier than if you were laying block and it worked a lot better.

Applying the first run of mortar with a pointed trowel as McRaven recommends.

Although the guys were making progress with a pointed trowel, we had smaller spaces to chink between some logs and it wasn't working well.

I finally convinced them to visit with our neighbor to see if he had any smaller tools that would be more appropriate. He looked it over, added some helpful advice, and brought over some hawks and smaller concrete finishing tools for us to use.

Once we got the right texture on the mortar, the right tools, and more knowledge, the guys made good progress, applying the mortar in two separate coats.

CW, after a bit of a learning curve, actually ended up being our finishing guy. Kit would get it close and then CW would clean up edges and such and put a smooth finish on the motar.

Everyone was involved who wanted to be. There was a job for everyone.

It's starting to look awesome! And the chore crew was starting to reap the benefits of the chinking being up five feet or so. NO wind coming through the lower walls! Awesome!

The inside of the barn. This will be filled with insulation, and then another layer of lath and concrete on the inside.

Once the men maxed out their reach level, they came up with this unique scaffolding per Great Uncle Peter's suggestion. It is simply half a sawhorse with extended legs leaning, but not attached to the wall. It can be quickly set up and moved around the building.

South side, hayloft door framed out so we can continue with the chinking.

We had enough mortar mix to finish out the kitchen walls on the inside as well. And it looks really awesome!

The south wall of the kitchen - my sink will be against this wall.

All chinked in. It is so nice to hear the wind and the rain, and yet not feel it. We are temporally closing the doorways with old plywood and OSB. Kit cannibalized parts from an old screen door and built a temporary walk through door. But we are working on building real doors, with black-smithed hinges, hand-forged nails, door handles and latches. I can't wait to show you that post!