
Bolsters, Mortises and Tenons
The walls are now six feet tall and we have our windows and doors roughed in on the lower level. It's time to start laying the ground work for the second-story hay mow. We will store the dairy girls' hay in the barn so it stays nice with no chance of getting rained on and moldy. Since there will be about 10-14 tons of hay above our heads, we need some extra beam work to support the load.
But first we took a break and celebrated PW's 9th birthday. We've made it a family tradition to go to our favorite mountain lake to swim, canoe, and pick huckleberries on his birthday.

Then it was back to work. We needed to create a support system to hold up the second story floor since we couldn't span 24 feet in one shot. We decided to use pilasters with tenons, posts with tenons, and beams with mortises and bolsters. A picture might help.

First, a pilaster is attached to the log wall, on the southwest side of the large door. A tenon is fashioned on top. Webster's definition of tenon is - a projection formed on the end of a timber for insertion into a mortise of the same dimensions. A mortise is a - notch, hole or slot made in a piece of wood to receive a tenon of the same dimensions.

We needed a mortise of the slot style cut into a beam, to fit over the top of the tenon.
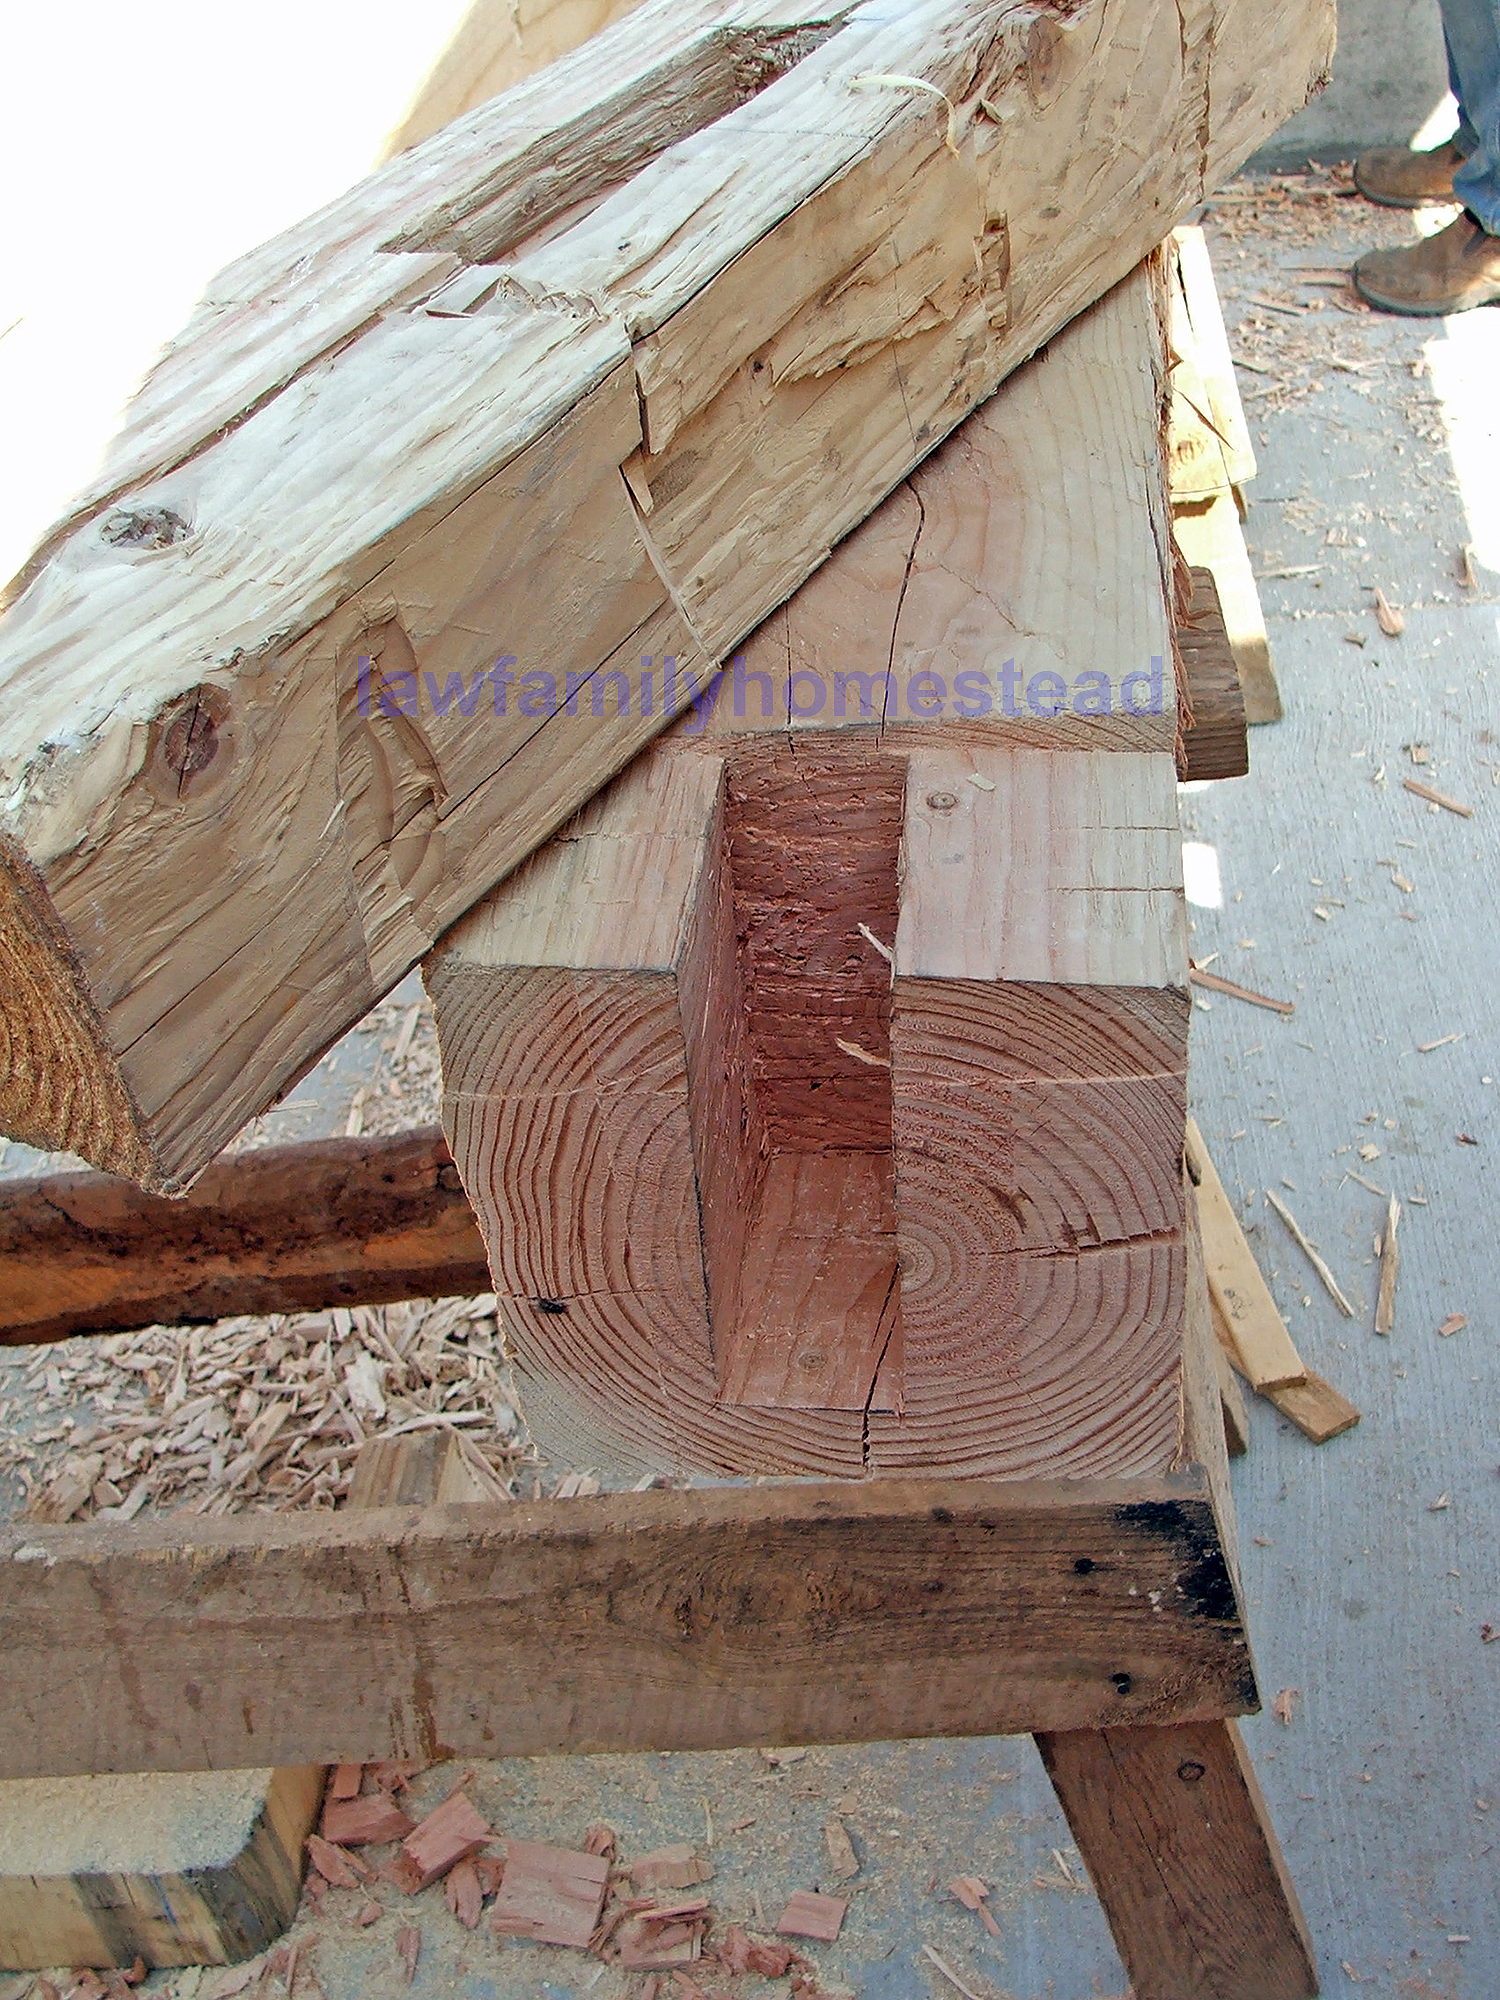
The first mortise chiseled into the first beam.

Here the mortise and tenon joint are finished.

Next step was to make a post with a tenon to support the other side of the beam. CW tries his hand at cutting out the tenon with a handsaw.

The post with tenon is ready for the final touch by Uncle Peter.
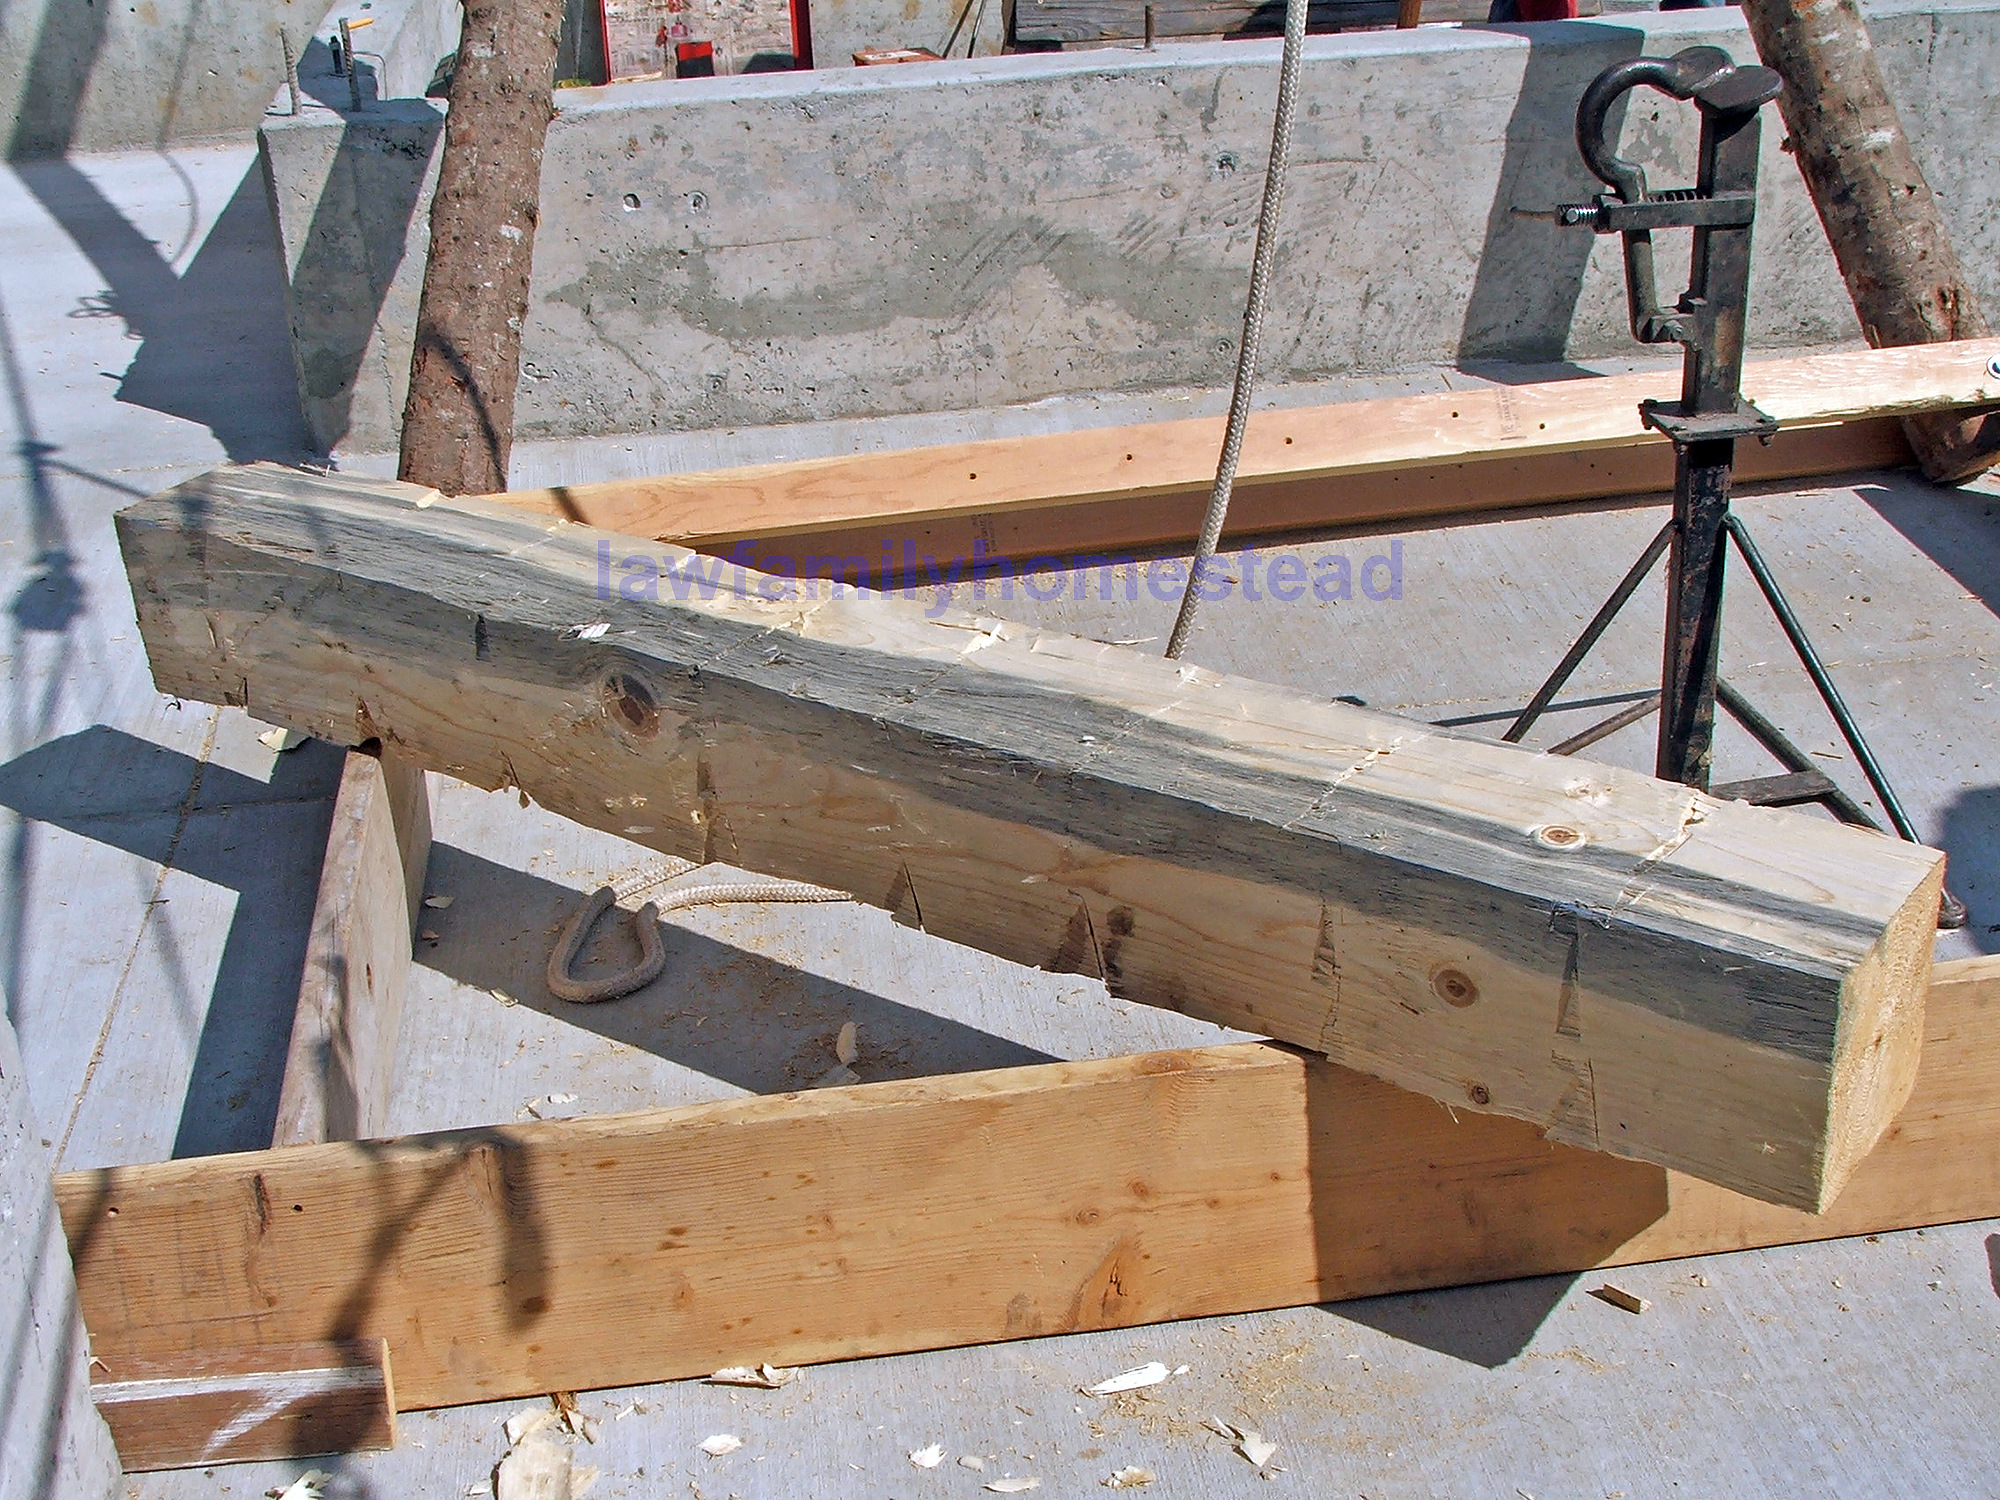
Before the beam, with mortises cut into it, can be laid on top of the posts, a bolster has to be made. Webster's definition again - a horizontal timber on a post for lessening the free span of a beam.

The men used chisels to construct a bolster with a mortise in the center.

The bolster is then placed over the tenon and rests on the shoulder created when the tenon was made on the post. Then the beam with the mortise is placed over the post tenon and rests on the bolster.

Next, Kit fashions wooden pegs to further secure the mortise and tenon joint.

The finished, west-side bay, looks absolutely awesome and rustic!
Kit even found a post with some blue wood on it for me.

It looks so awesome standing up.

A post with a bolster in place on its tenon ready for the mortised beam.

Kit and Uncle Peter carry a beam with a mortise chiseled into each end to its matching tenons.
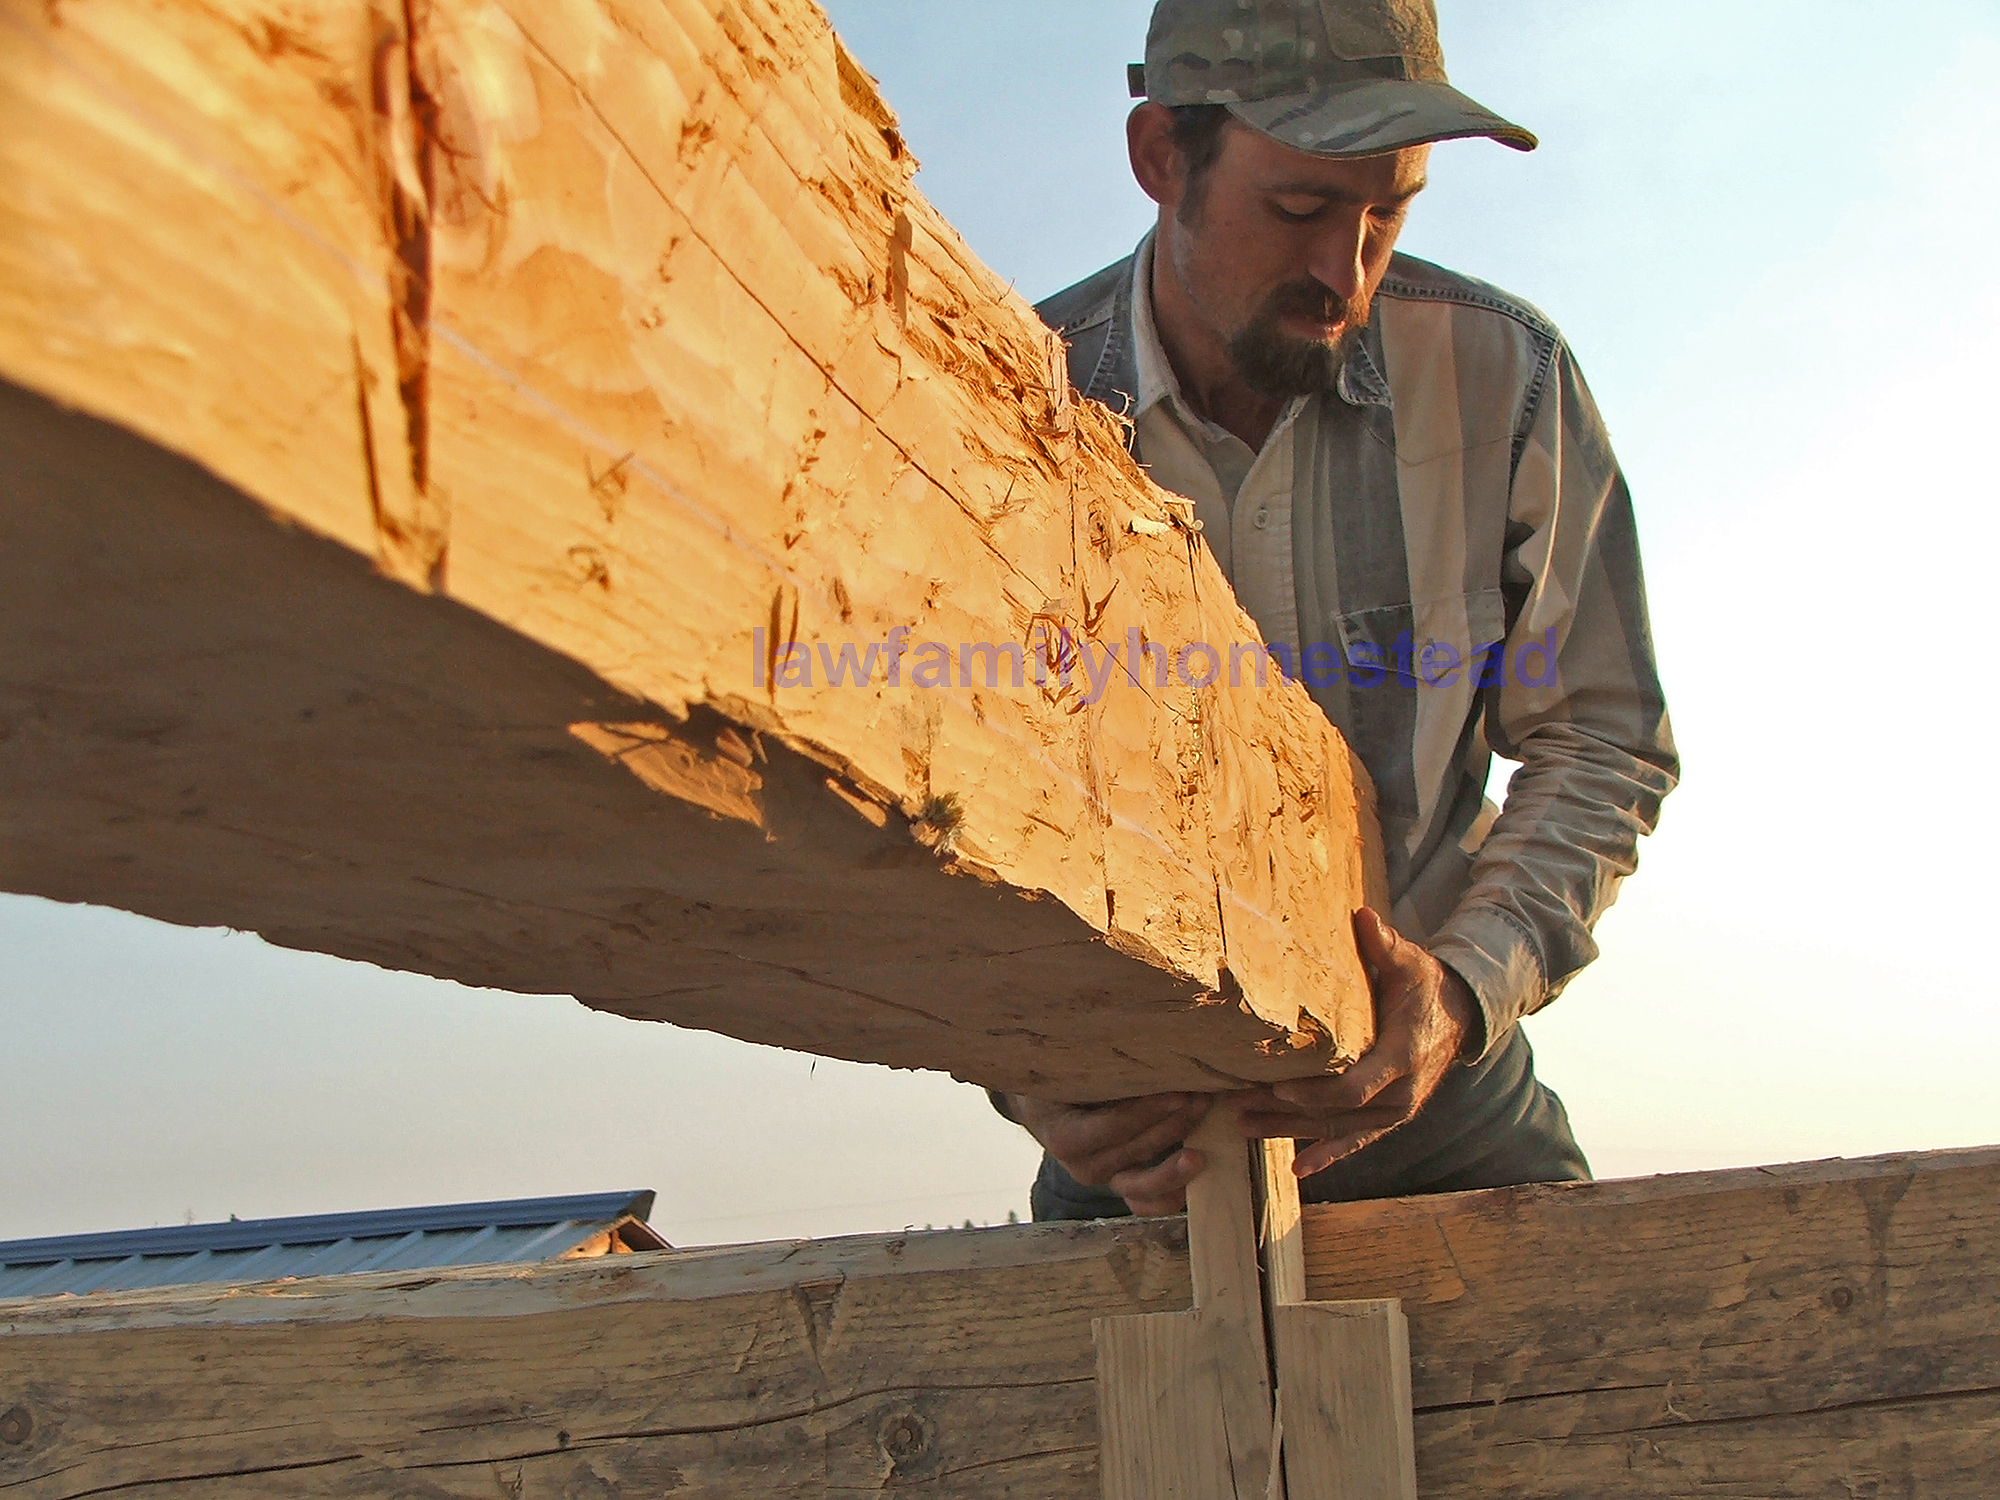
Kit places the mortise over a tenon (in the light of sunrise) on the east-side bay.

A snug fit is preferred but sometimes it’s a little too snug and requires some "encouragement."

Uncle Peter’s end requires encouragement as well.

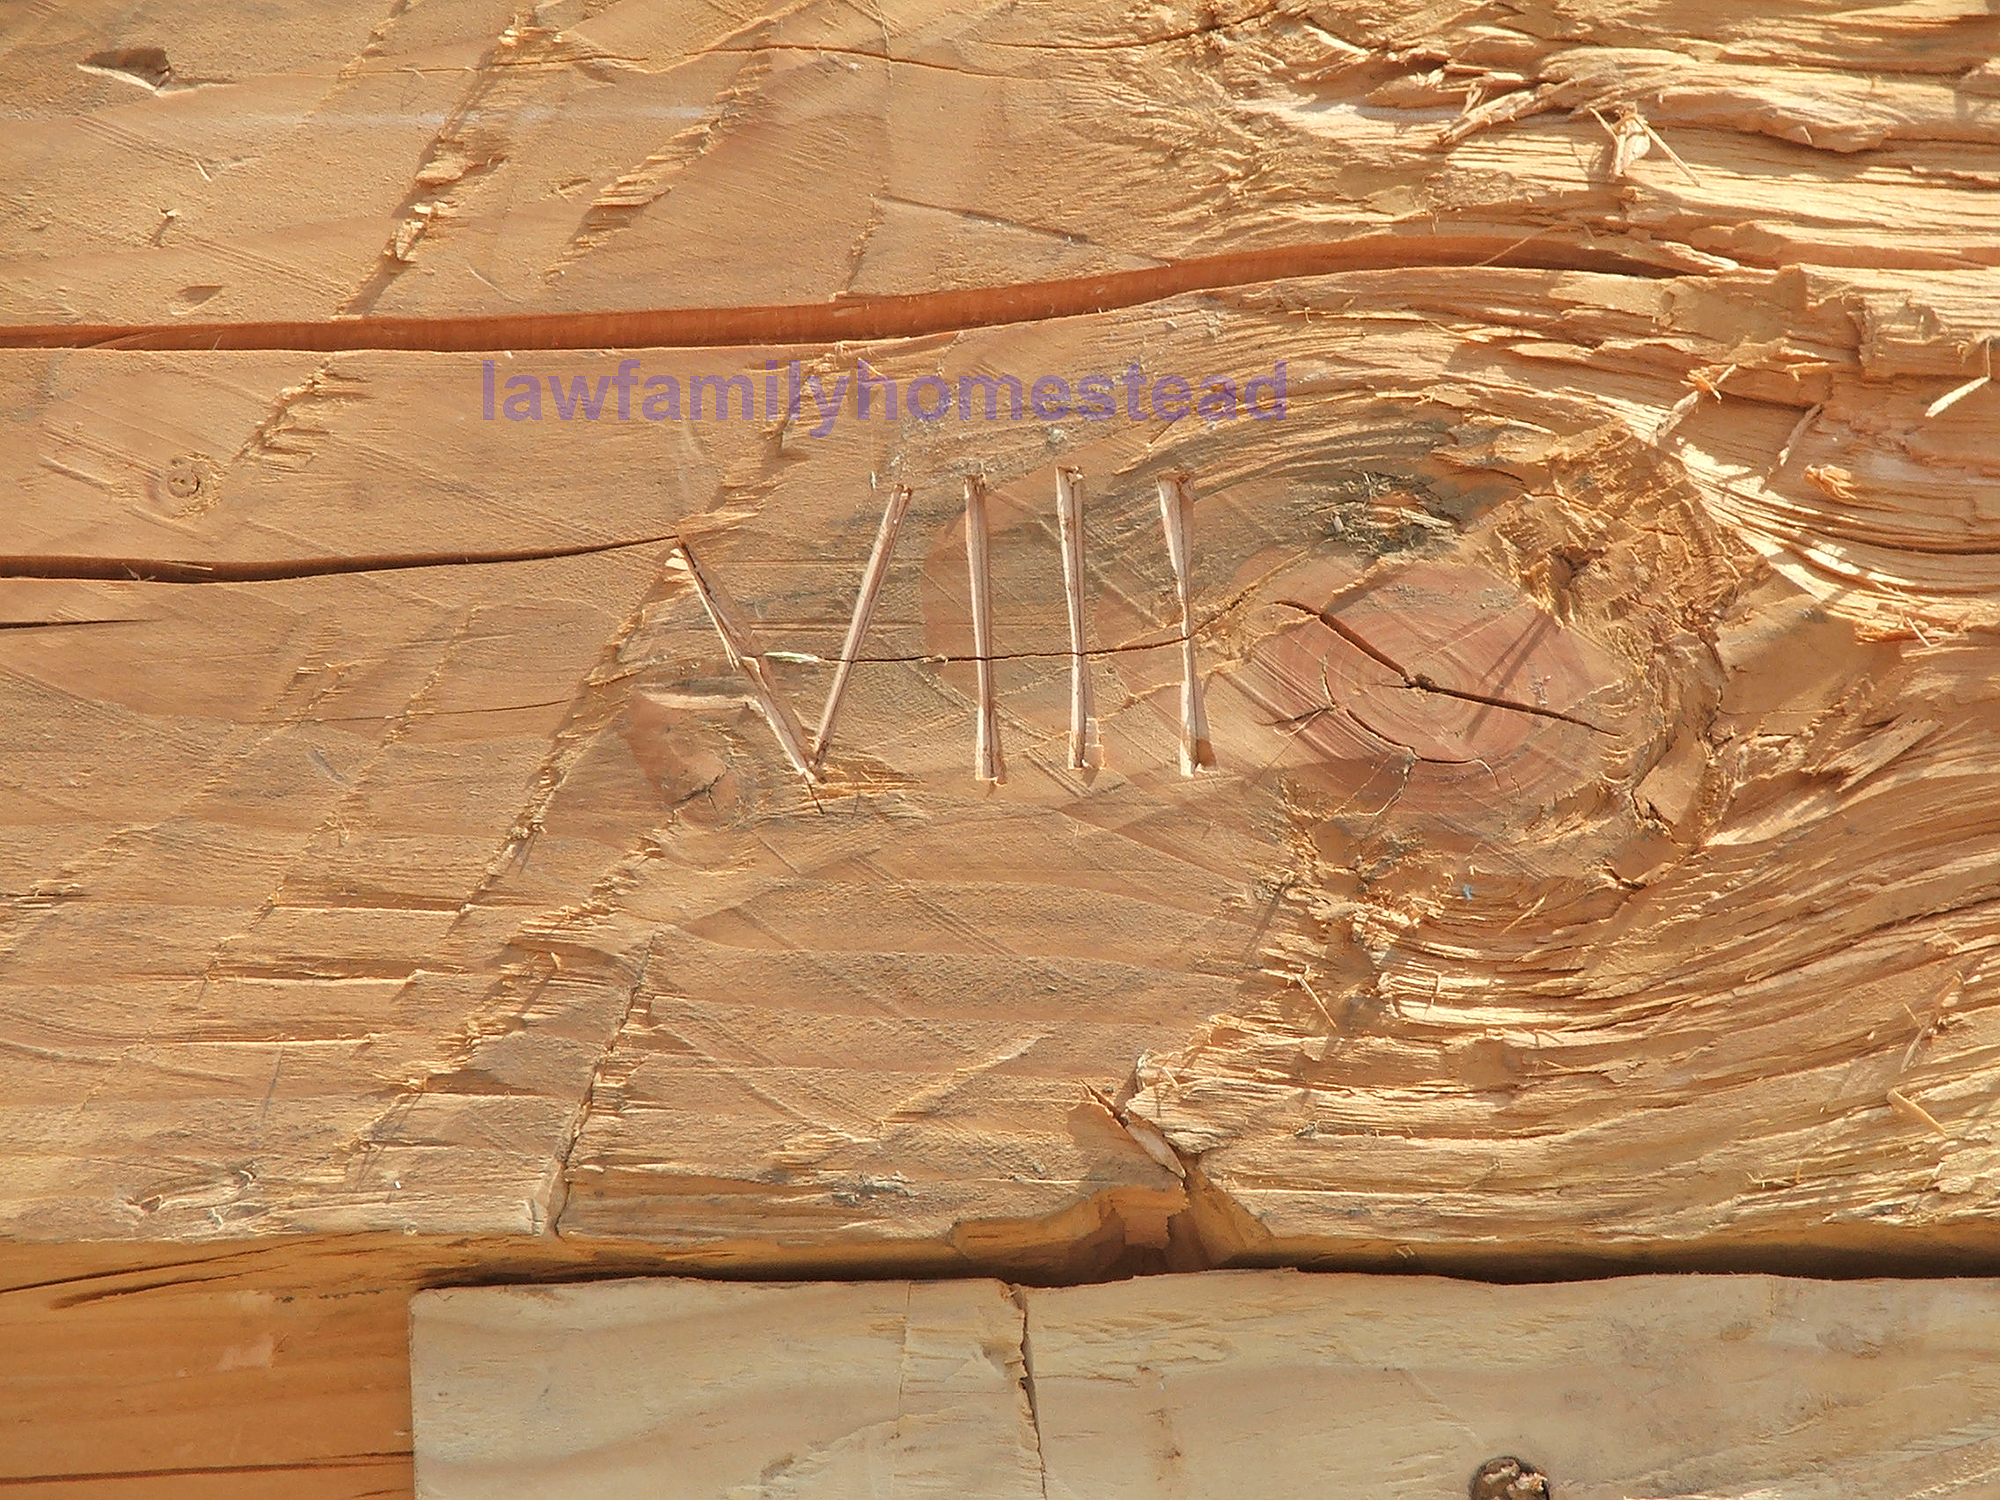
Look closely at this mortise and tenon joint . . . notice anything?

How about a close up? See the Roman numeral now? This was done in the old days. When a farmer wanted to raise a barn, he would actually assemble the barn on the ground, by himself, in sections. Each section and joint was numbered and then disassembled and stored while the next section was assembled. When he had everything built, he would call for the old fashioned barn raising. The men of the neighborhood would come, haul out all the beams and reassemble the barn with matching Roman numerals and then each section was raised and braced into place while the next one was being matched up and assembled on the ground. While our barn wasn't built this way due to its dove-tail notch design, the process was helped by using the Roman numeral system to match each tenon with its proper mortise and bolster. Each notch is custom made to fit and so it is imperative that the right ones are put together or it will cause no end of grief. Plus, we think they look really cool up there on the beams.
I just love the look of them chiseled into the wood.

A number three in the rising sun.
Stay tuned as we put up the floor joists and the second story floor next!